


Small-property land managers can attract deer with food plots.
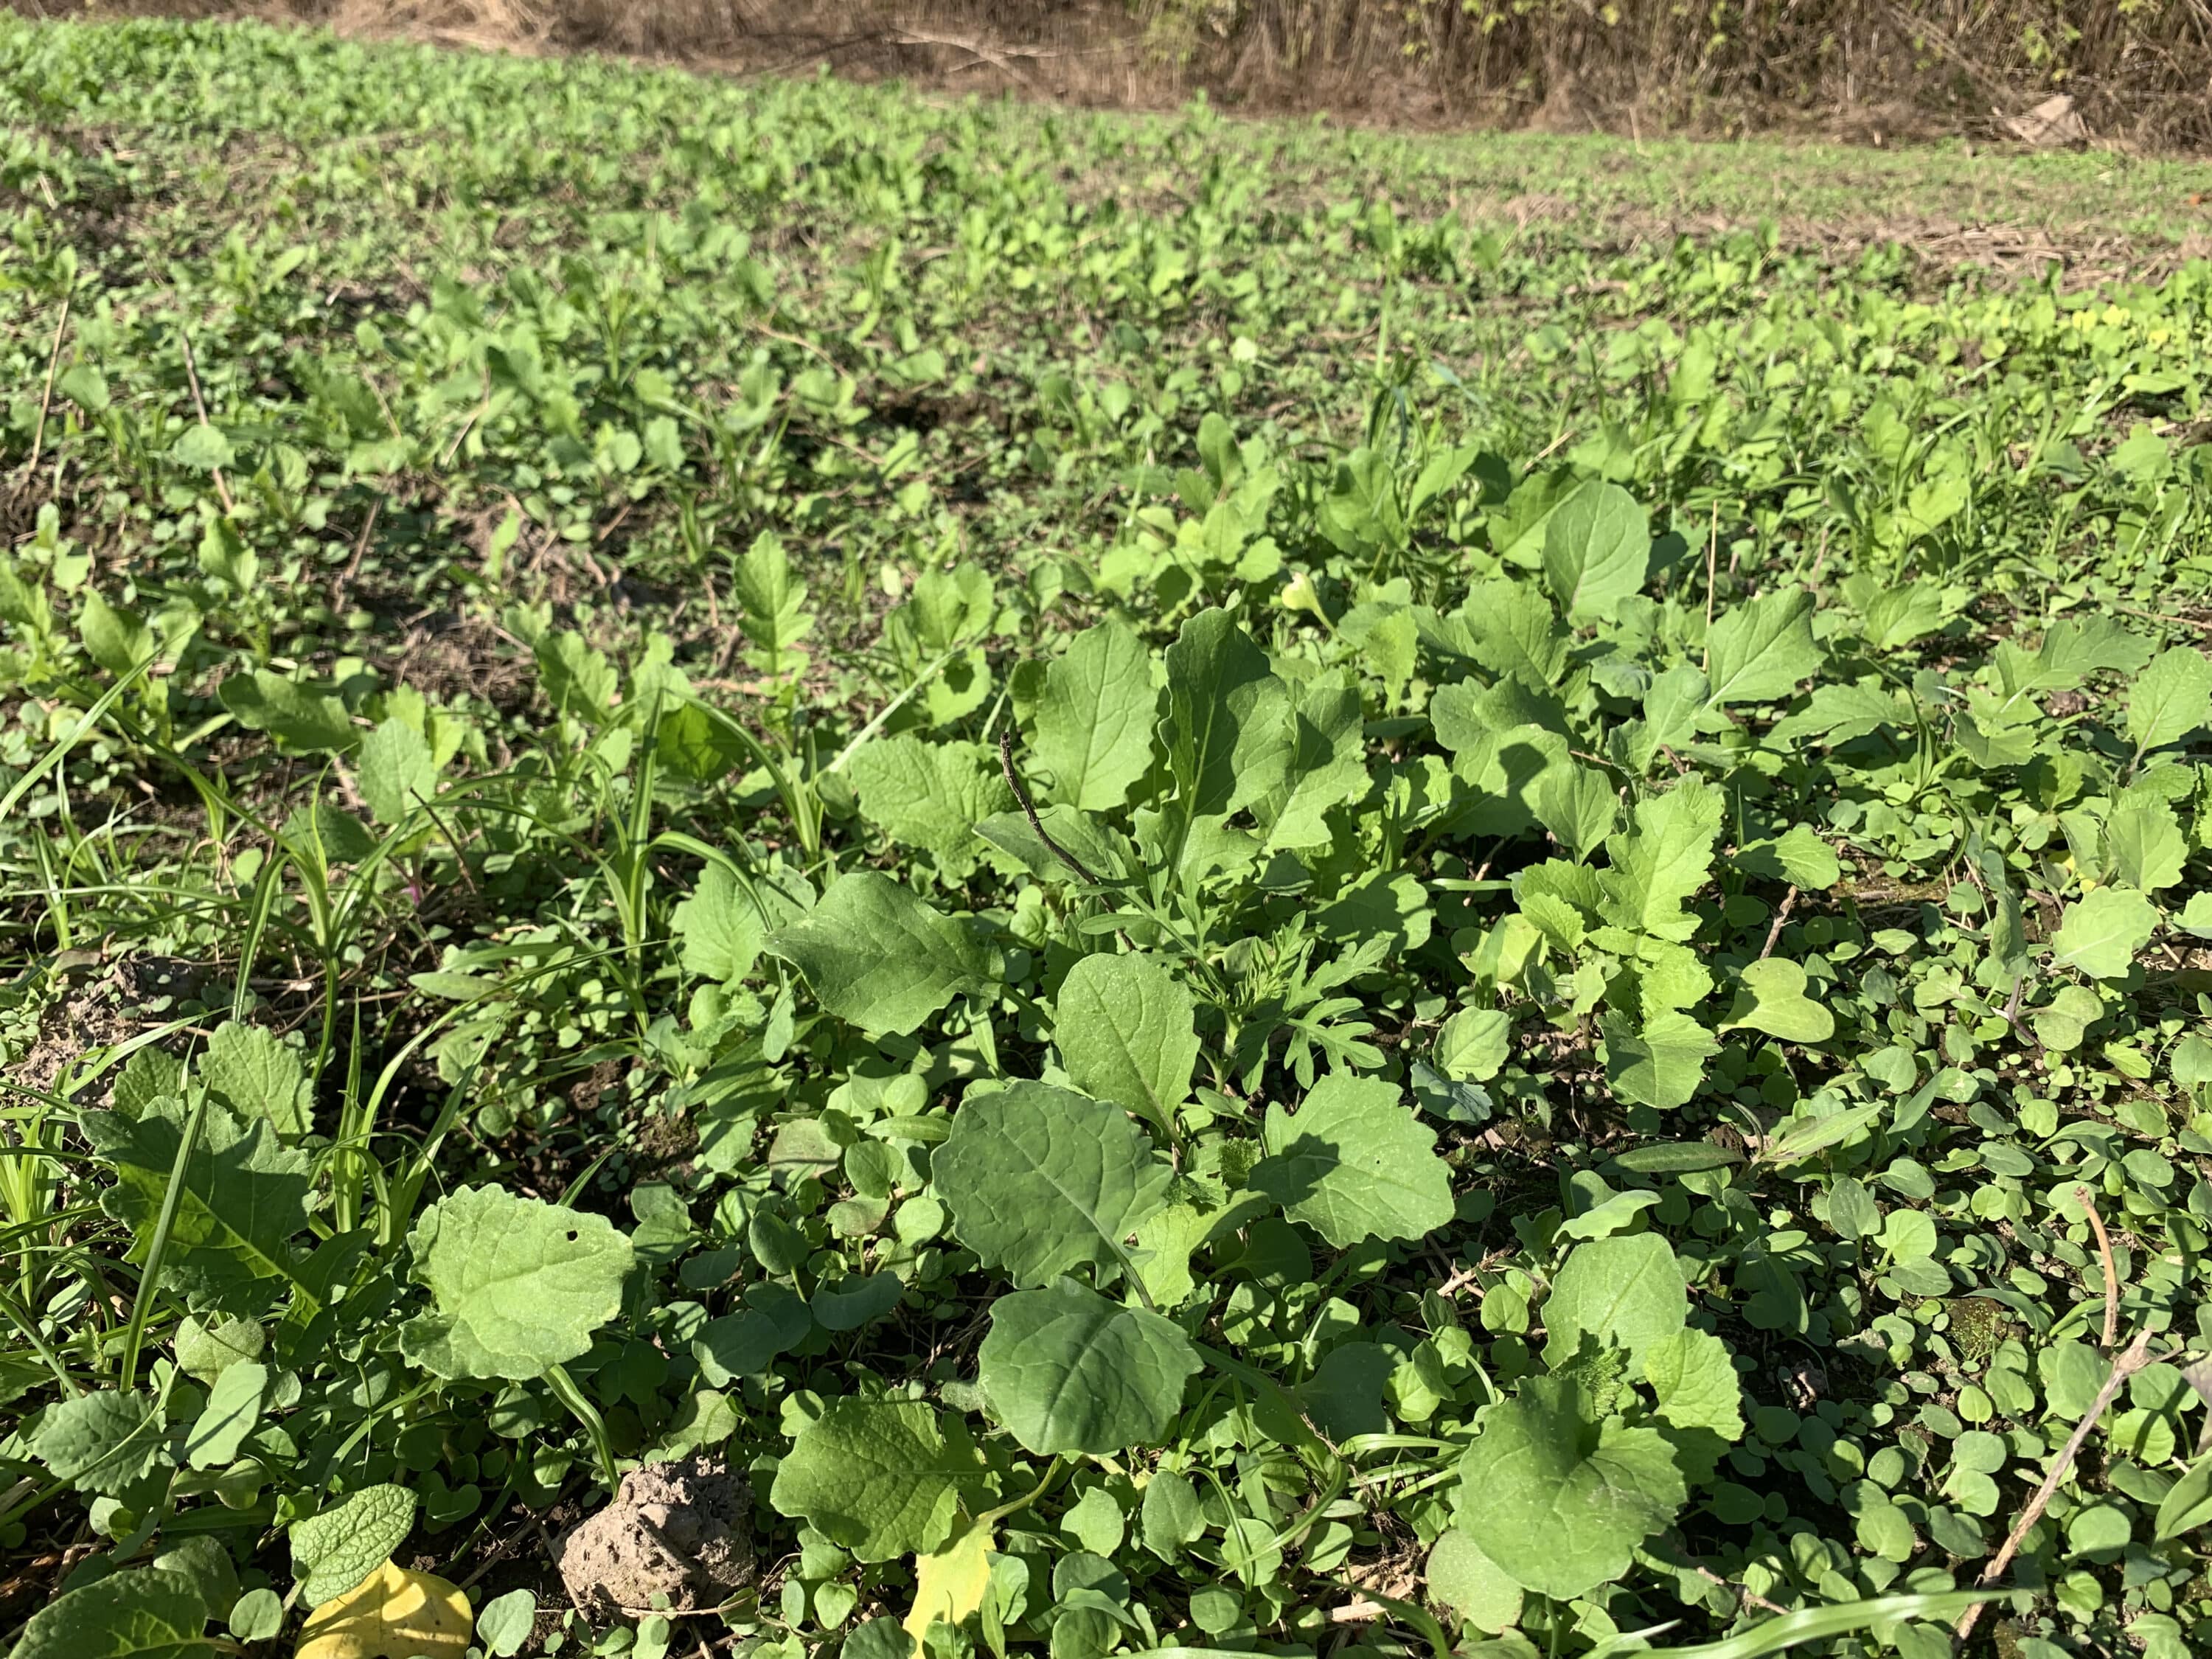
Land managers don't need massive tracts to plant food plots.
The hunting industry has falsely created barriers to entry for hunting. One of the most common is that you need a lot of acreage to successfully plant food plots and harvest deer in them. So, we dream of someday having the keys to the gate of our own large property so that we can finally plant luscious deer forage. For most, this will always be nothing more than a fantasy because, let’s face it, few of us will ever have the financial resources to secure a big property.
Rather than dream about unrealistic or unreachable goals, snap back to reality and consider what you can do with what you have. I know folks who’ve shot deer on as few as 3 acres, debunking the myth that you need lots of land to attract deer to hunt.
Before you argue that you don’t have the equipment to plant a food plot on your small property, just know that I’ve planted small food plots with nothing more than hand tools. If interested and physically up to manual labor, and you have a small property, then make plans to plant a food plot with hand tools. Here’s how to go about it.
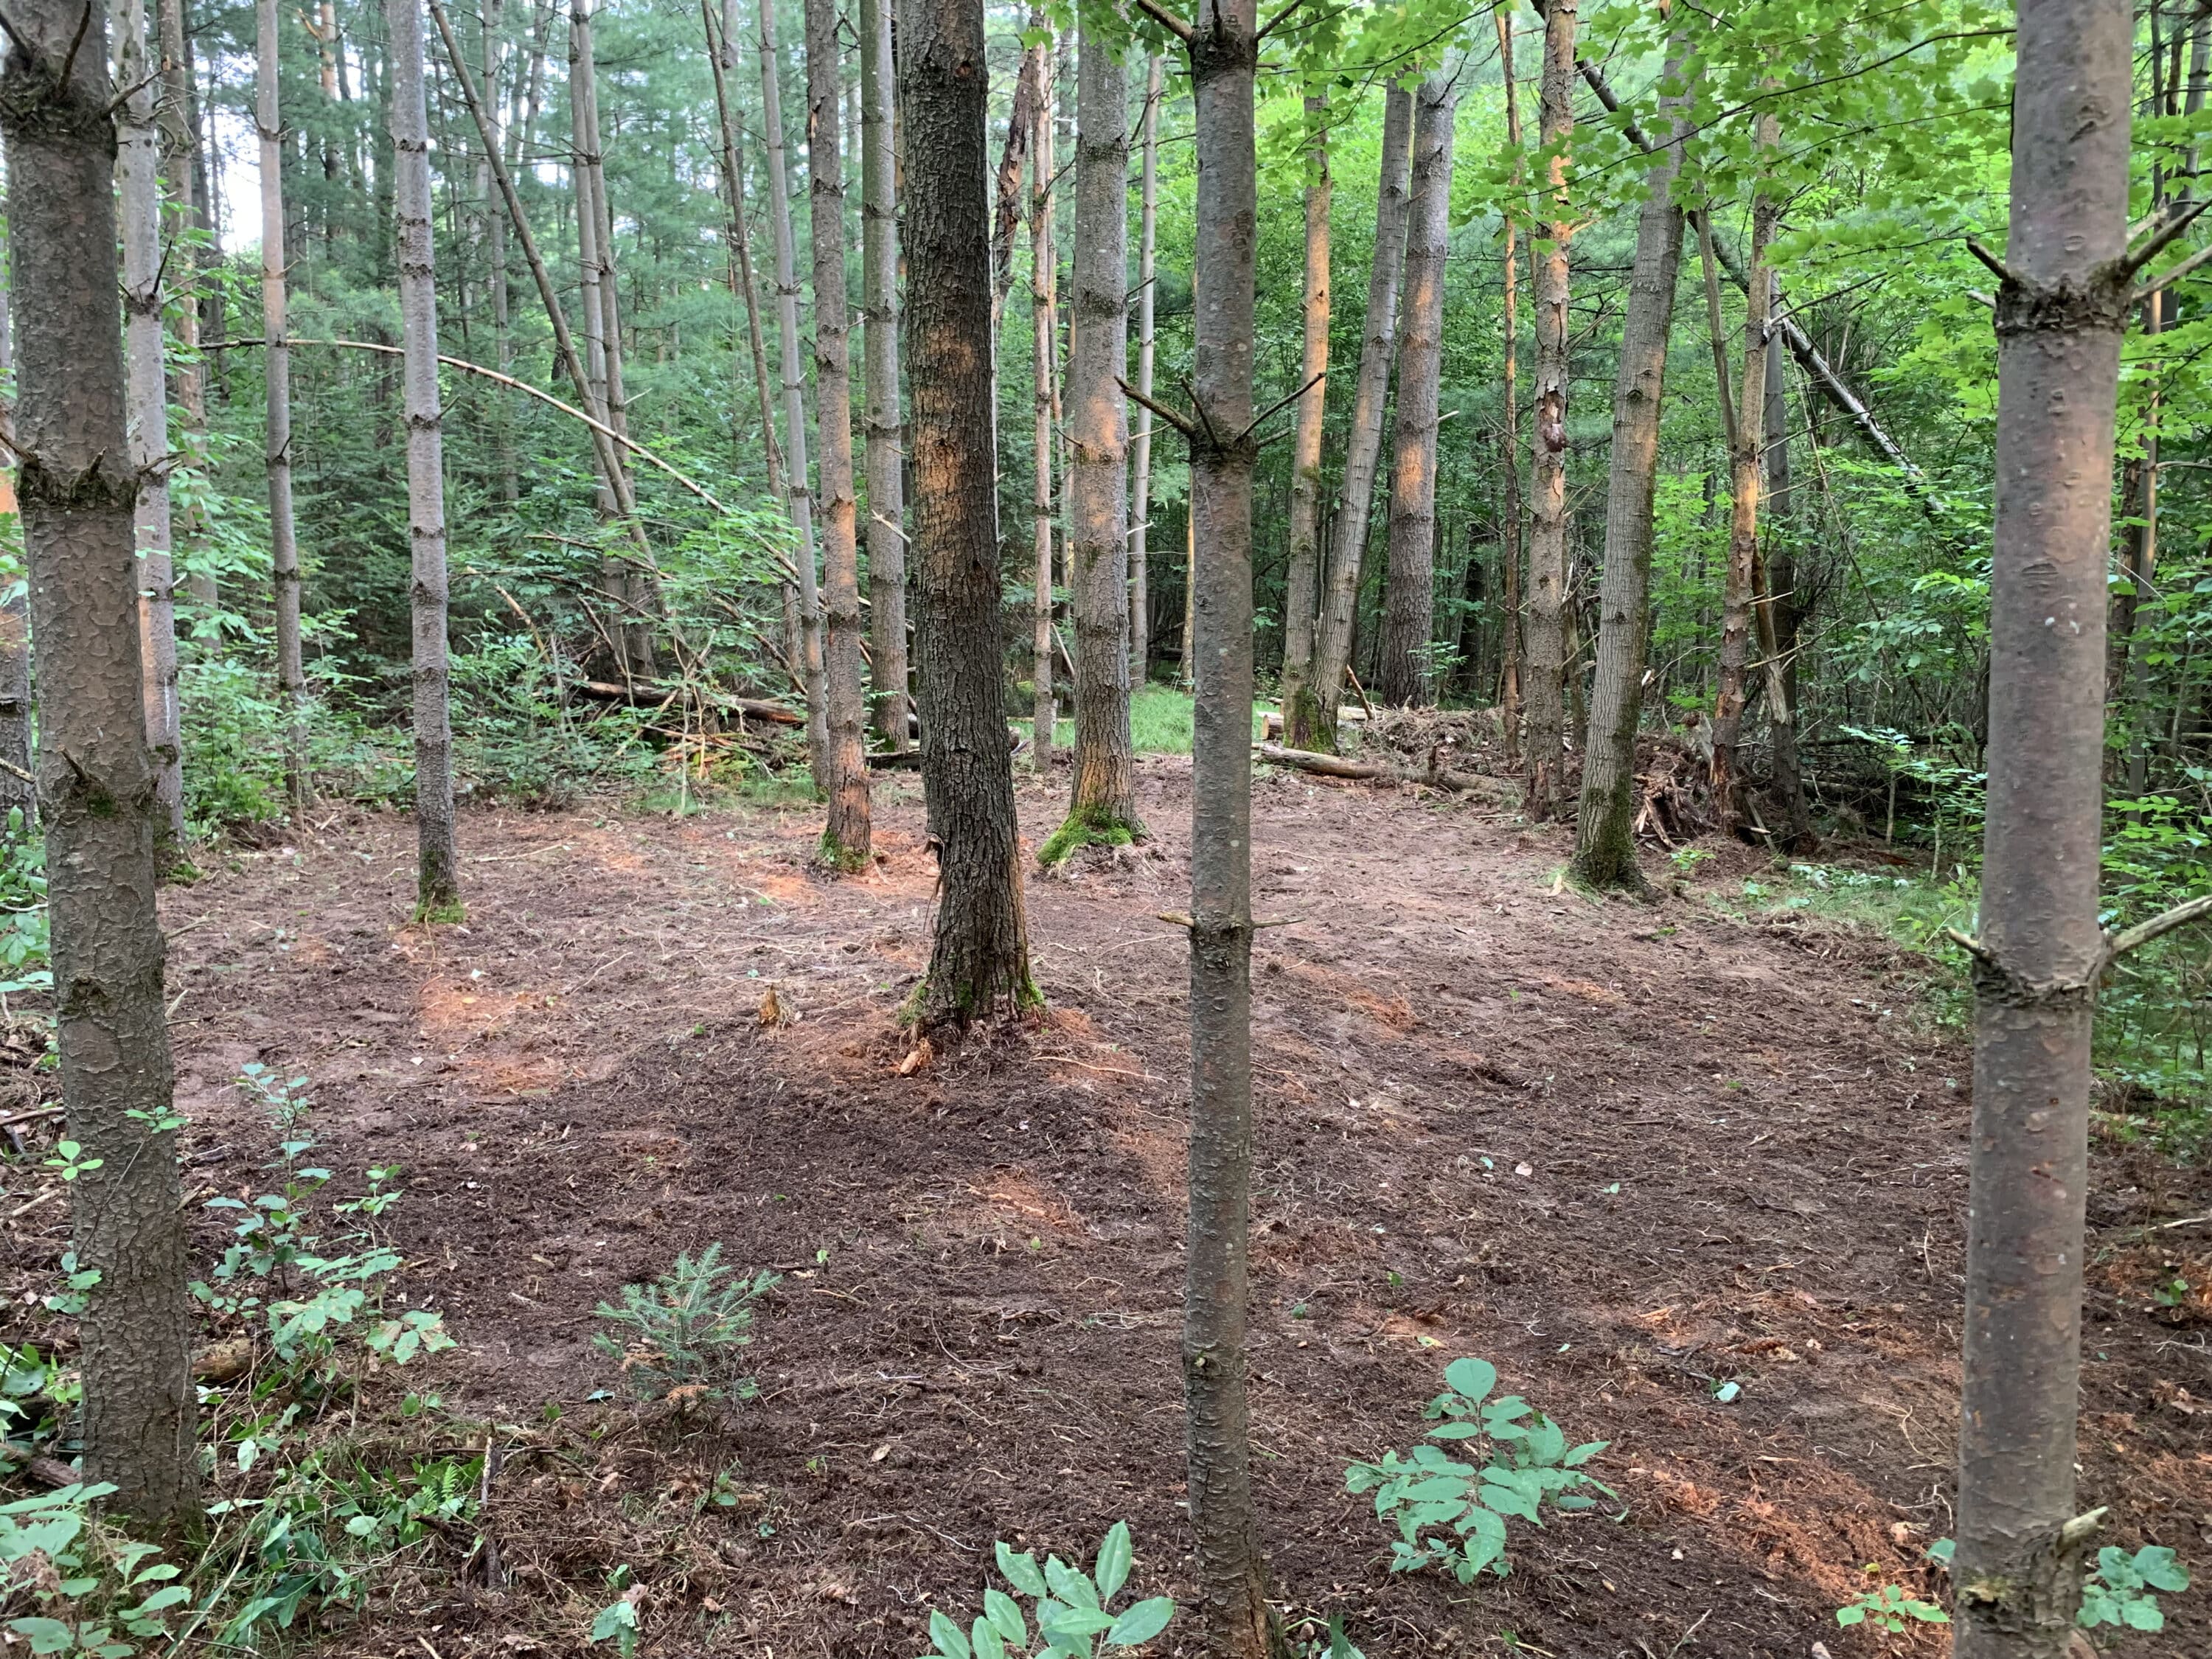
Soil in a small site like this 400-square-foot opening can be exposed with nothing more than a garden rake and some manual labor.
Step 1: Choosing a Site
I want to make the initial disclaimer that not every property will work for food plotting. Perhaps the property is too wet, swampy, sloped, or rocky. If these criteria didn’t eliminate your property, then follow along.
The best way to begin with selecting a site, especially with very small properties, is to identify and evaluate existing clearings, lanes, or trails through the forest that get some sunlight. If any such options exist on your small property, consider the location in relation to where deer will come from. Why? You don’t want to plant in a location that you can’t hunt during the prevailing winds unless you have no other option.
If you have no existing openings that receive sunlight, consider the effort it will require to cut down some trees. If you have a chainsaw and are familiar with safely cutting down trees, this might be practical. I’m not talking about sawing an acre worth of timber. I’m talking as little as 400-500 square feet. Maybe it takes only one large tree with a dense canopy to achieve the sun-to-soil exposure needed to grow the goods. Choose your site carefully before sawing, and either rent a stump grinder, or plant around the stump(s).
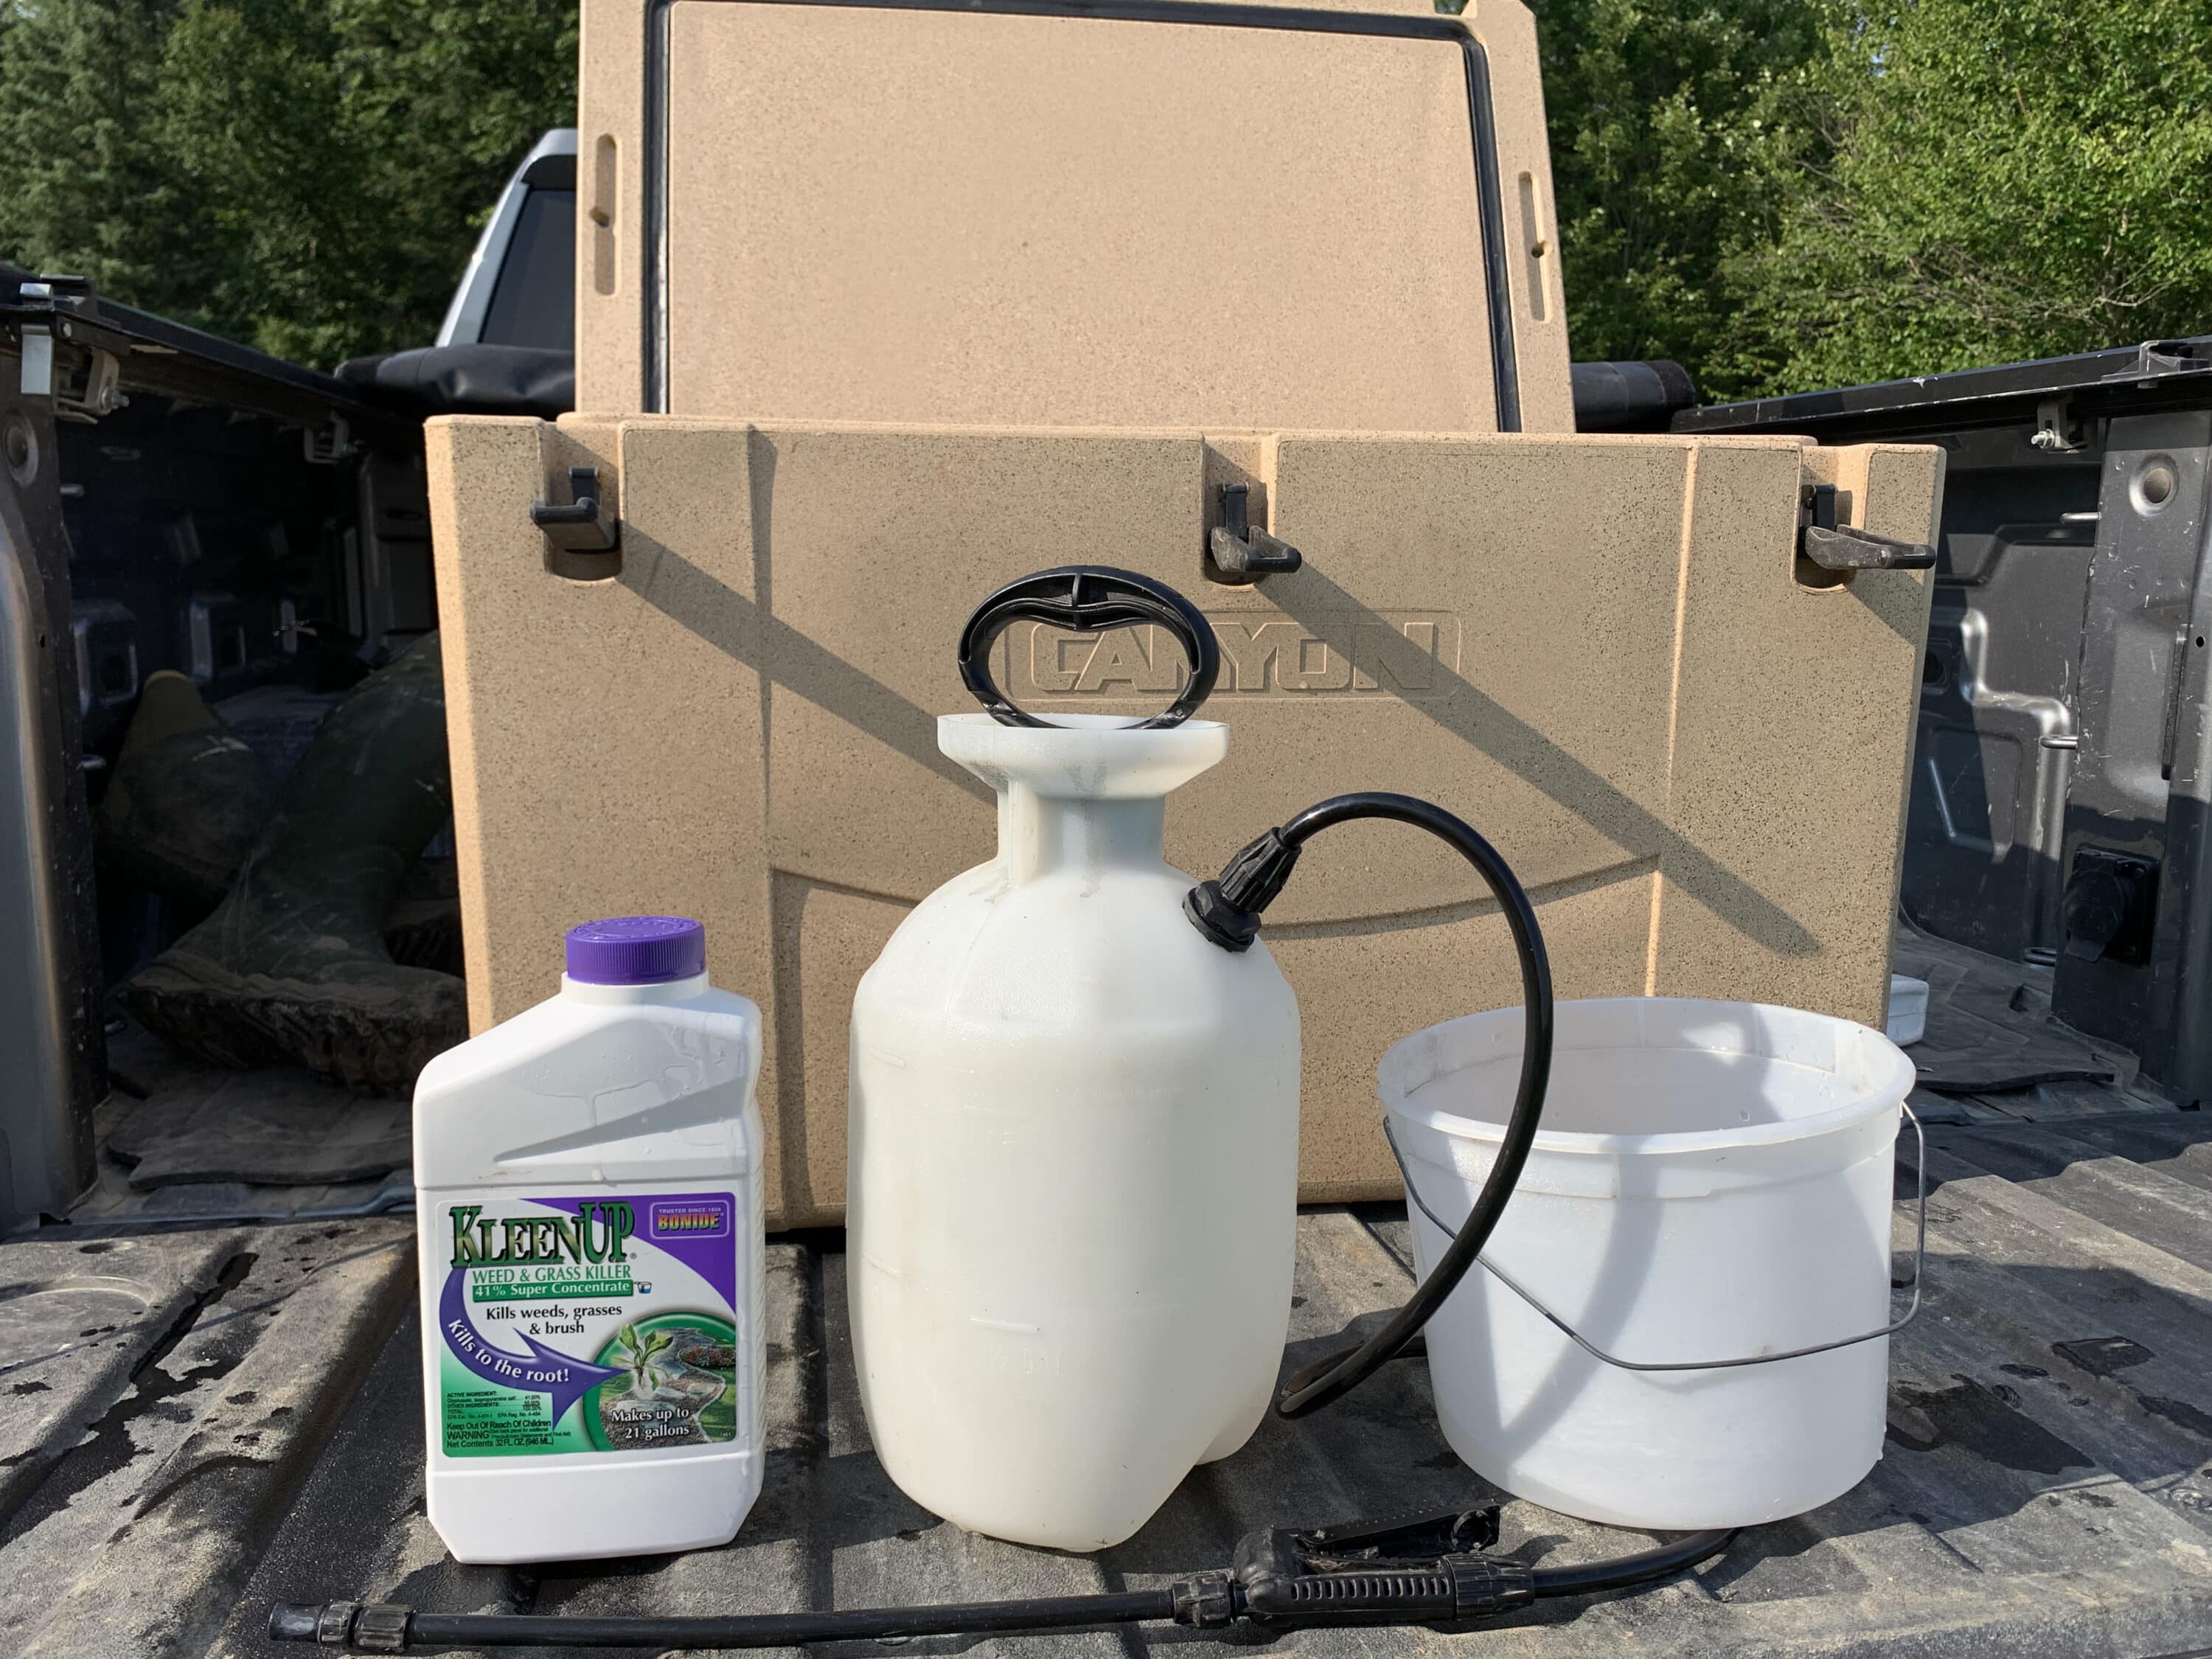
Spraying your site with an herbicide will manage unwanted weeds.
Step 2: Prepping a Site
Whether working with an existing opening or one just created by sawing a few trees, the site will require more preparation. If there are a lot of weeds and brush, pick up a hand-pump sprayer and address them with an herbicide. Once they die, I suggest a weed whacker (don’t forget eye and ear protection) to knock everything down to the soil. Remove all the trimmings from your opening.
Now, the more you prepare the soil, the better results you’ll likely have when planting seed. Some seeds such as Evolved’s Throw & Gro mix are designed to germinate and grow with mere soil contact, so you can often get by with nothing more than a garden rake to expose and rough up the dirt. For other seeds that require tilling so that they can be raked into loose soil, a gas- or battery-powered garden tiller can help achieve properly worked soil.
Once you’ve exposed or tilled the soil, it’s time to walk around and remove stones and sticks from the site. The fewer obstructions, the more seeds that hit the soil and germinate.
Spring Whitetail Scouting 101: Making a Plan for Fall Deer Seasons
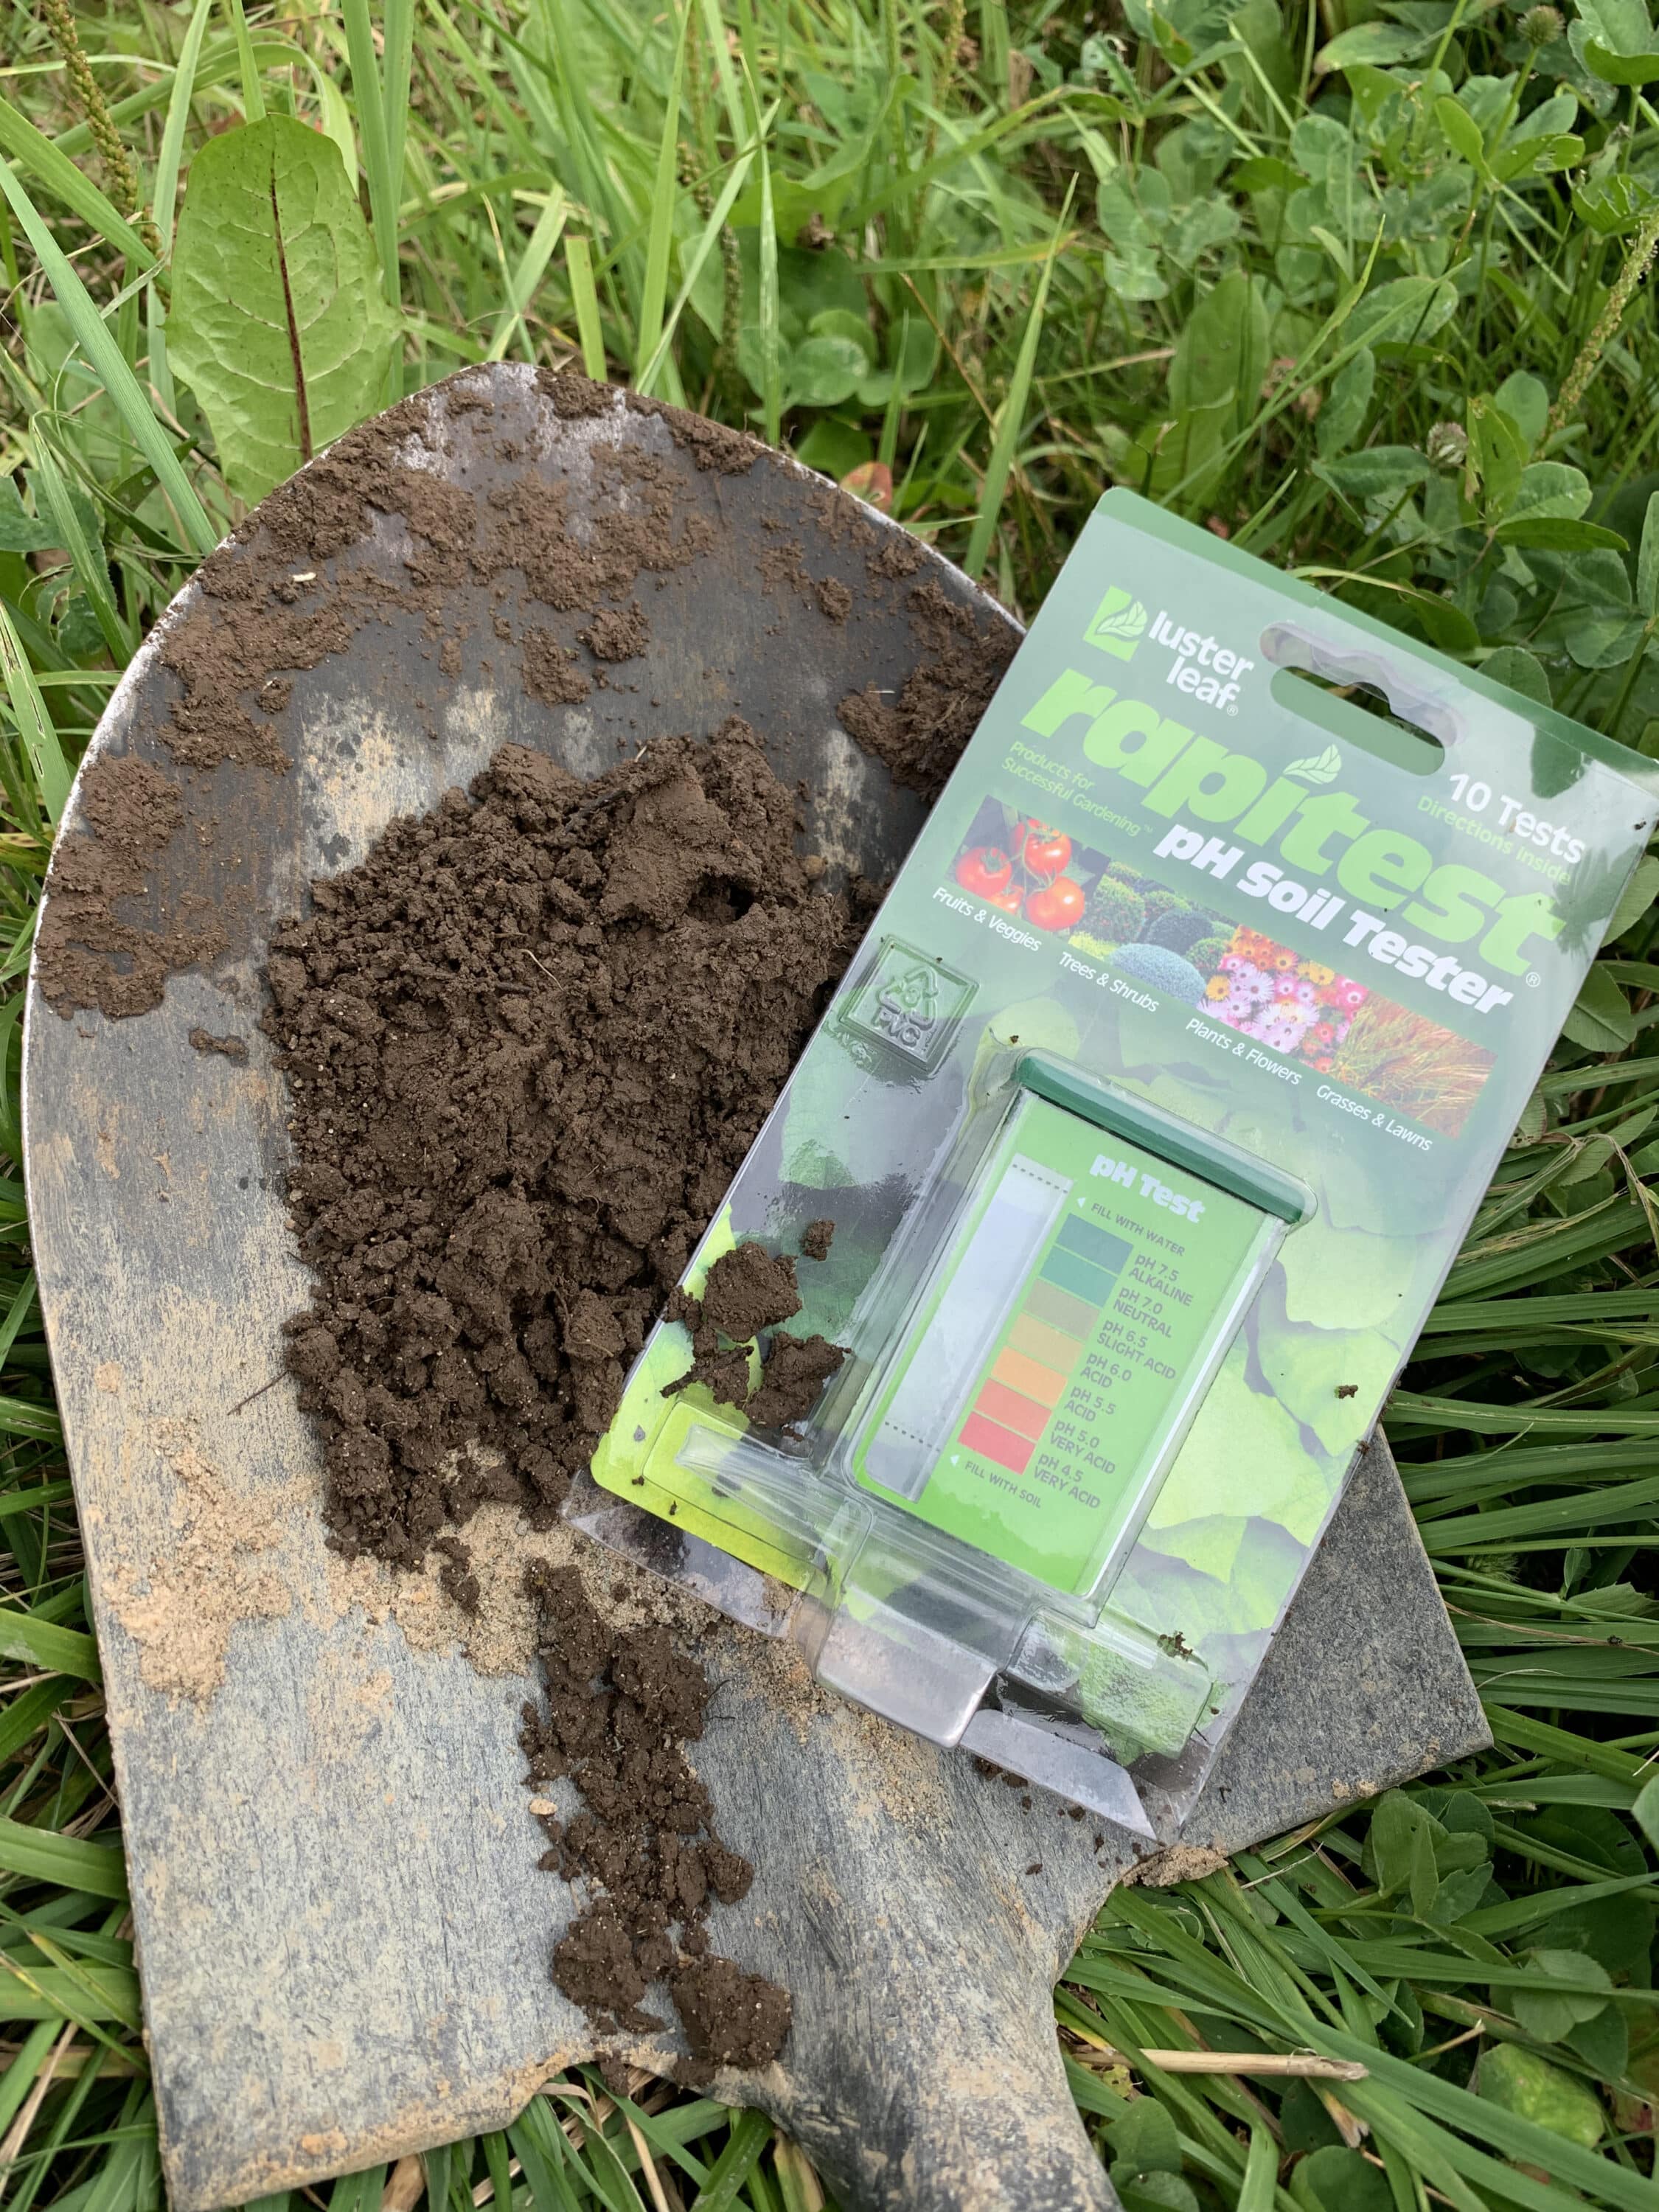
A soil pH test can help you see whether your current soil conditions are ideal for your specific planting.
Most farm or garden supply stores sell pH test kits. The seed supplier should have a recommended soil pH for the specific seed or seed blend you’ll be planting. For example, Evolved’s Throw & Gro mix is suitable for a soil pH in the 5.5-7.5 range. If your soil’s pH level is too low, you can increase it with agriculture lime (usually sold at farm or garden stores). If it’s too high, elemental sulfur can lower it. Getting your pH to the specified level can drastically improve your result.
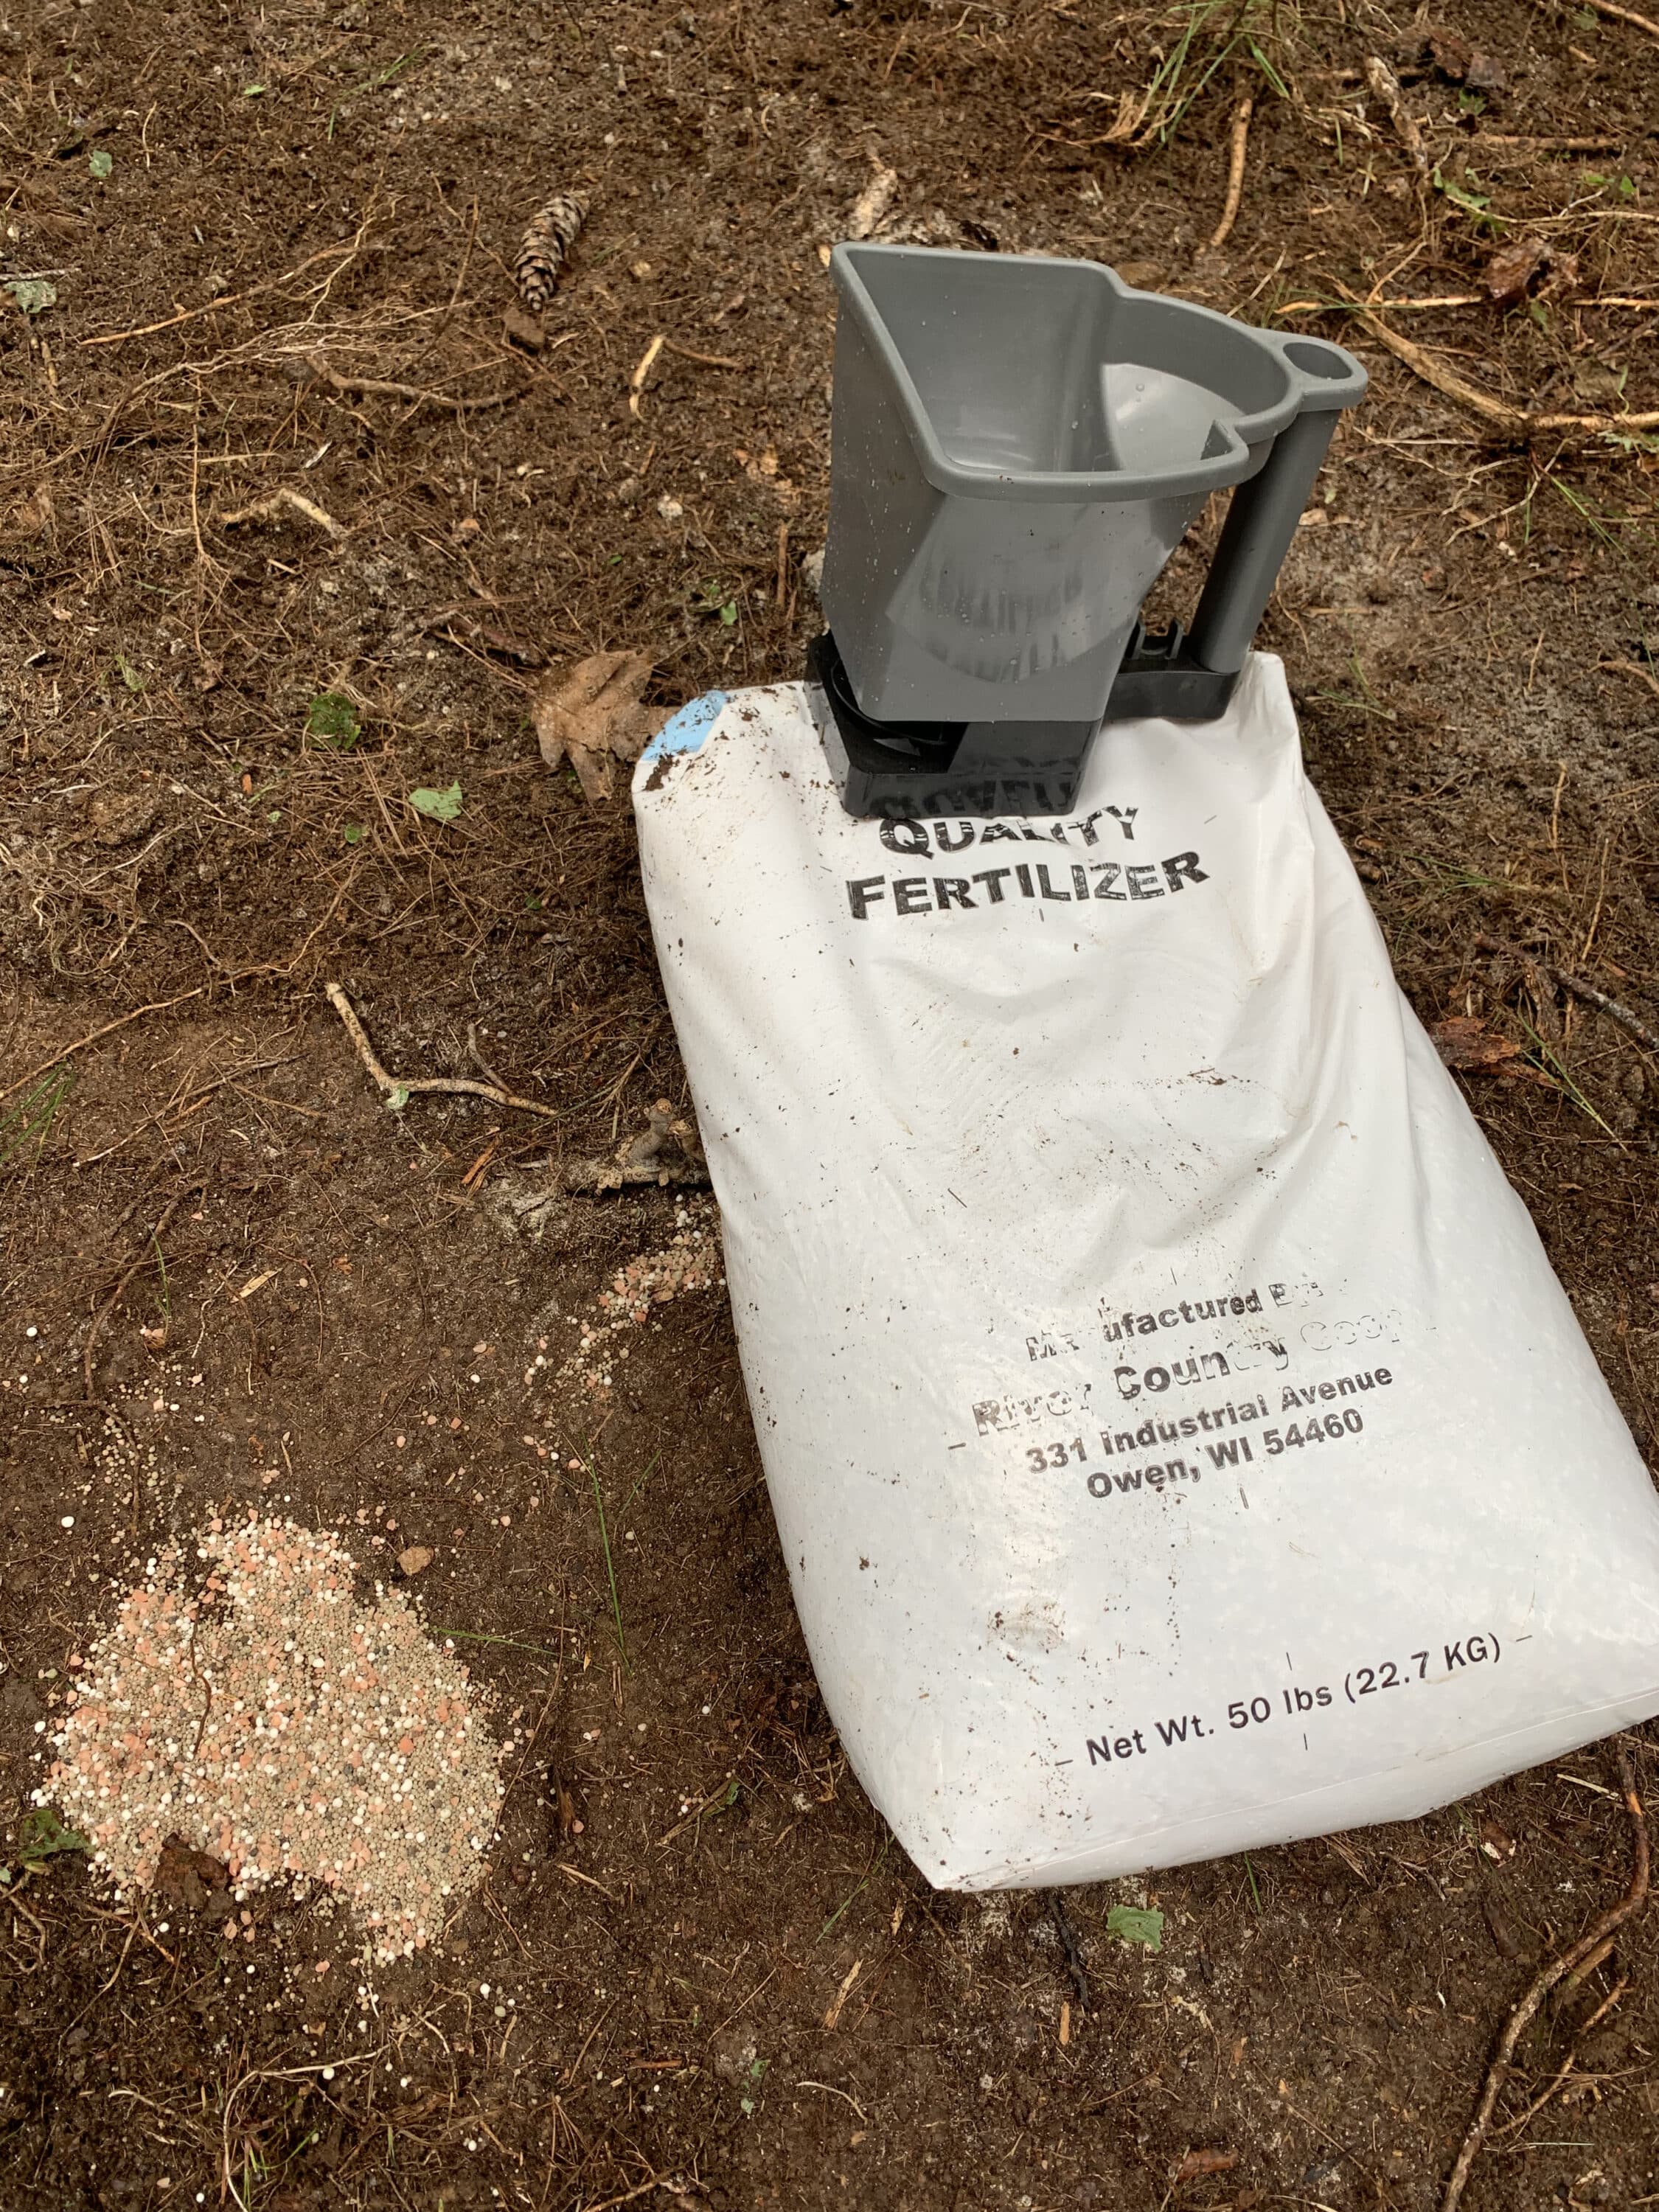
Before planting, broadcast the fertilizer recommended by your seed supplier for your specific planting and then rake it into the soil prior to planting.
Step 4: Seeding and Fertilizing
Once you’ve purchased your food-plot seed, be sure to follow the supplier’s planting timeline for your specific geographic region to optimize results. Also, the seed supplier or even the seed bag should list a recommended fertilizer type and amount. Using Throw & Gro as an example once again, Evolved recommends 13-13-13. I always apply fertilizer and rake the soil prior to planting the seeds so that the fertilizer doesn’t burn them out.
Once you’ve quickly worked the fertilizer around, it’s time to seed. Here again, you don’t need big equipment. I use a simple handheld broadcaster available wherever grass seed is sold. Embracing the “the-more-the-better” mindset, I made the mistake of excessive seed broadcasting on my very first plot. After that conundrum 16 years ago, I immediately learned to follow and trust the seed supplier’s instructions for broadcasting.
If the seeds require mere soil contact, then you’re done. When I’m planting a seed that required me to till, I typically run a landscaping rake back and forth over the entire plot to get the seeds turned into the soil. If you have a lawn mower or 4-wheeler and a lawn roller, you can pack the dirt with the roller after raking to ensure better soil contact, but don’t sweat if you don’t have those items.
Shed Hunting Road Trips: Advanced Tips and Tactics to Find More Antlers
Unless you have a way to water the plot, the ball’s in God’s court.
Step 5: Praying for Rain
Unless you have a way to water the plot, the ball’s in God’s court. You best get on your knees and pray for rain. This has been an issue over the last few years in states like Kansas, Oklahoma and both Dakotas. Fortunately, a small plot is a small financial investment, so if rains don’t come and the plot doesn’t produce, you’re out little besides a bag of seed and some sweat equity. And, if your flopped attempt was a spring or summer planting, consider a second attempt with a fall planting.
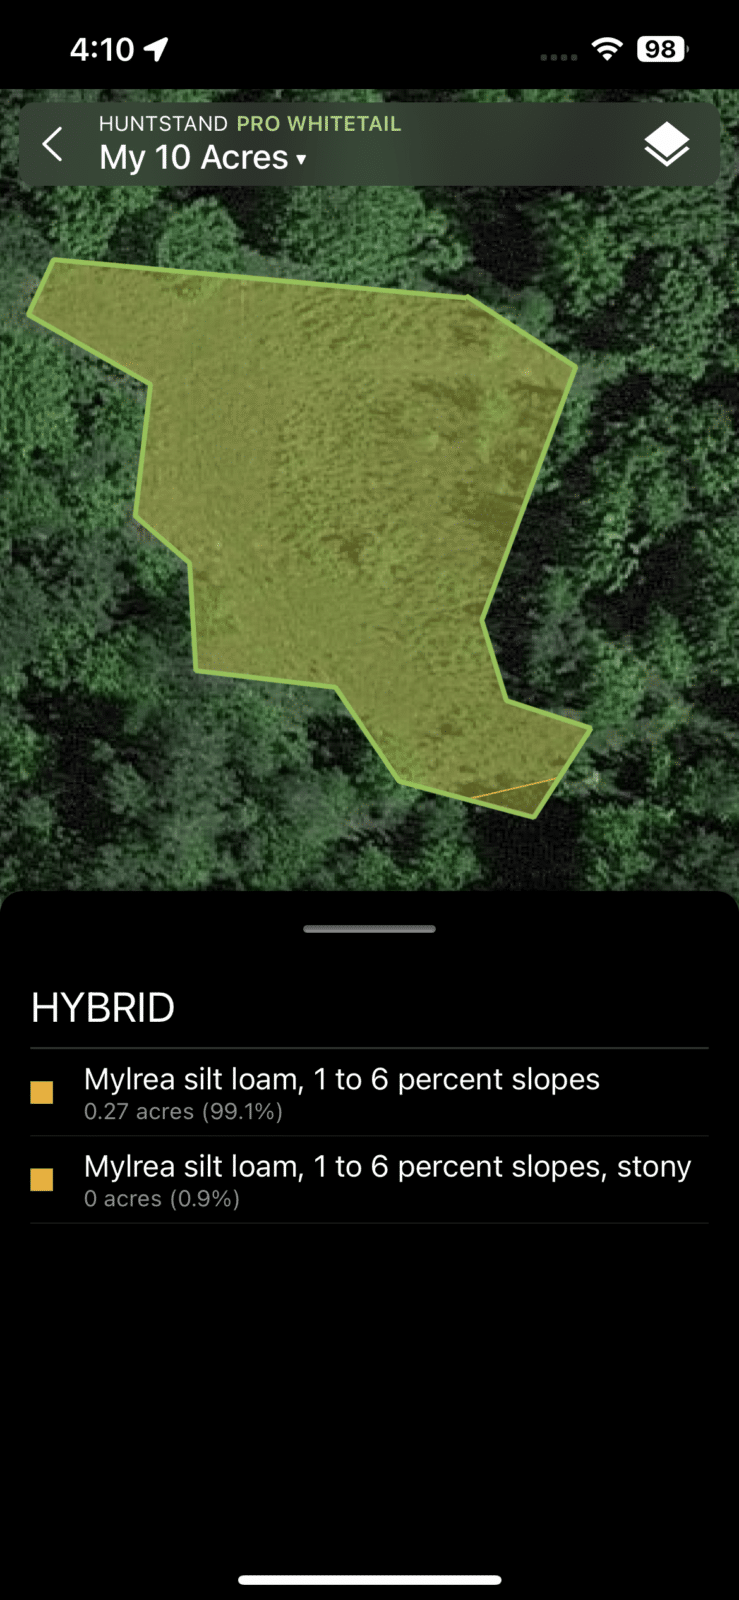
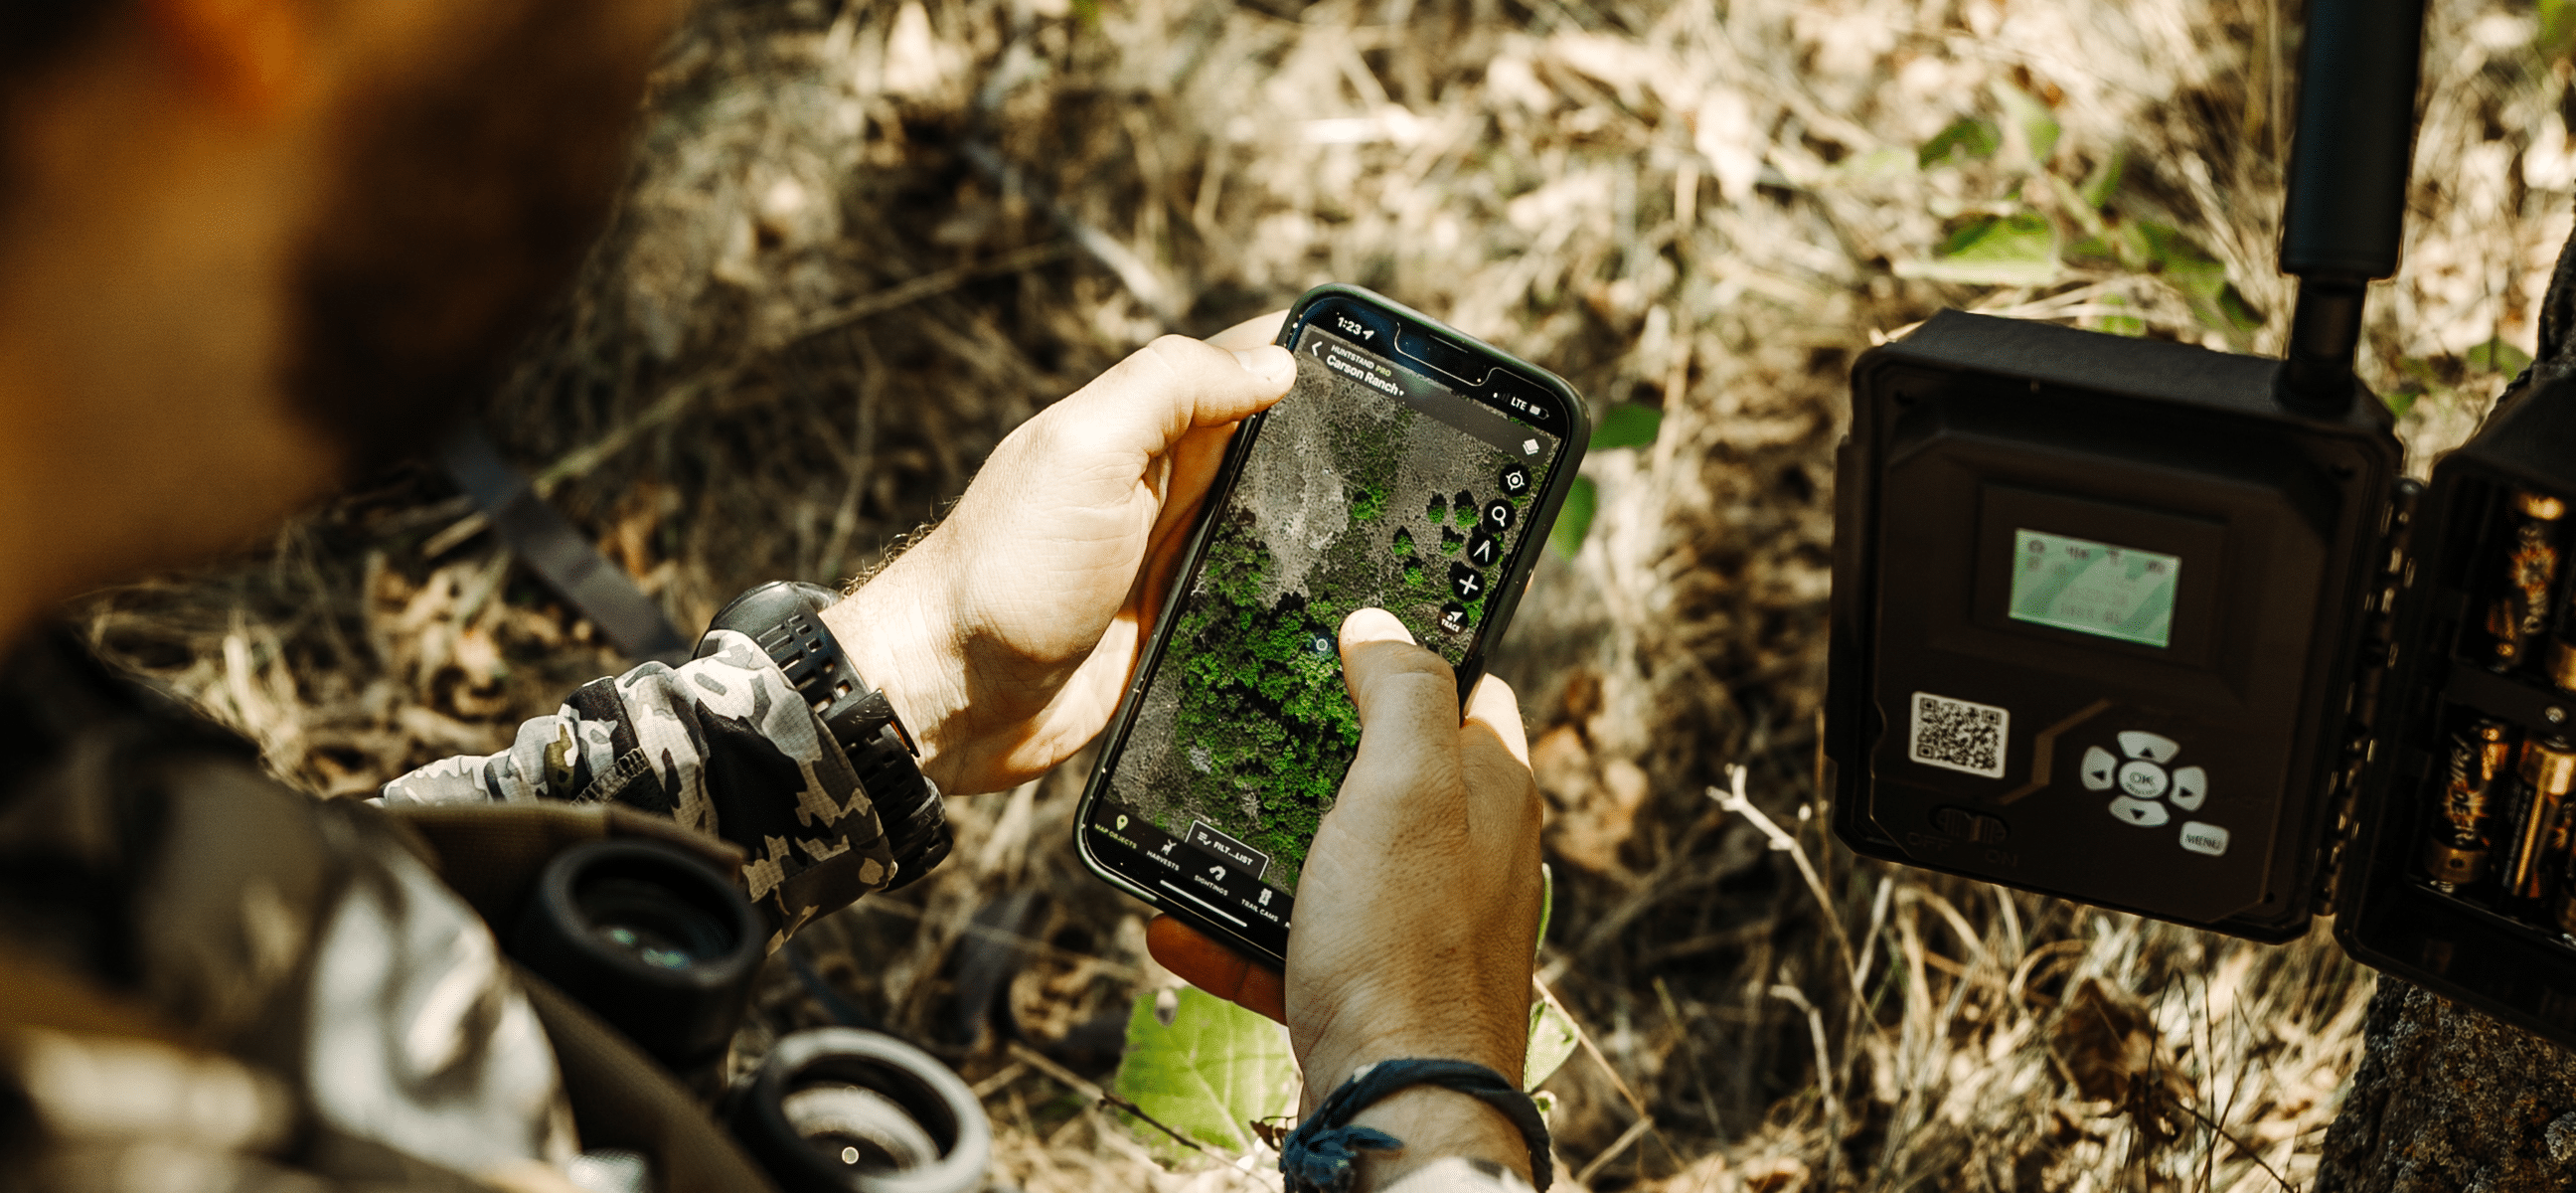
Step 6: Utilizing HuntStand Pro
Most small properties don’t hold deer. In other words, it’d be rare for a deer to be born on your land, live there without leaving, and die there. That’s true in most cases, regardless if you have a luscious food plot, or not. You’re trying to attract deer that live elsewhere but occasionally pass through your property.
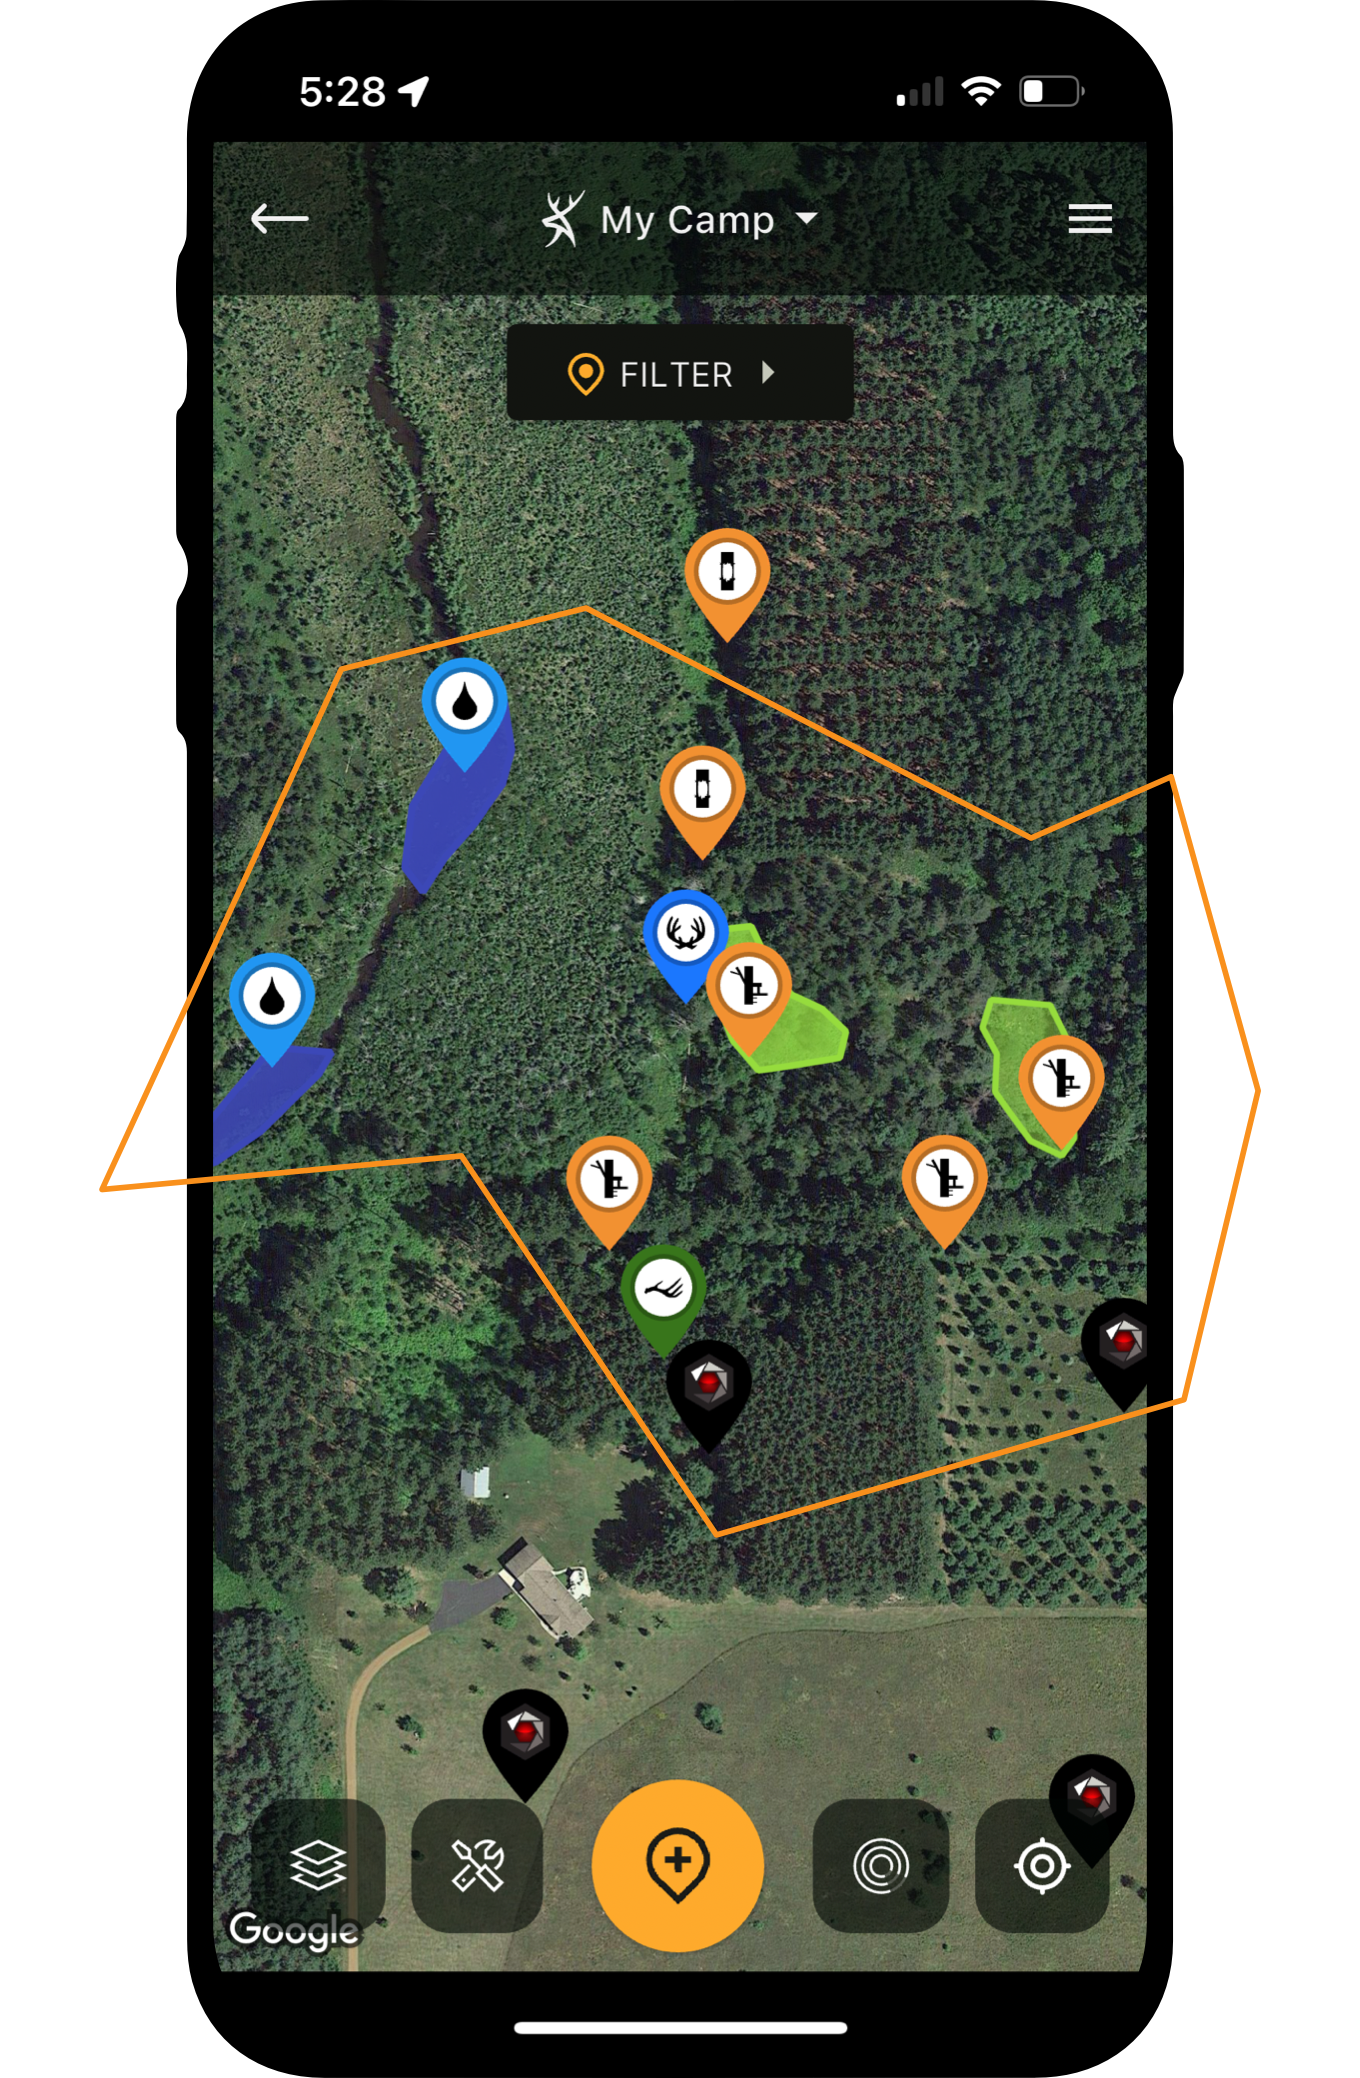
Of course, knowing where deer are bedding isn’t something you can figure out on-foot if your property is surrounded by other private parcels you don’t have access to. Alternating between HuntStand’s Hybrid and Terrain base maps is the best bet for identifying potential bedding areas. If you have more than one option for plot placement, making some predictions as to where deer are bedding and where they’ll enter your plot using HuntStand can be helpful.
Another practical HuntStand use for planting a small plot — or any size plot for that matter — is to calculate the size of your site so that you know how much seed to purchase. In any of the base maps (I prefer Hybrid), select the + symbol on the right side of your screen (mobile version). Then, select the Draw Shape tool, which allows you to drop points to create any shape you like.
Once you complete the shape, save it as a food plot. Now, you’ll have the acreage for your site. Then, when you select the shape, it will give you the acreage and an option to “Show Soil Data.” Click that, and a window that opens will detail soil types and provide slope percentages. I still suggest a soil test, of course, but this should help you to know if your site is suitable.
Reality Check: The Things We Learn from Shed Antlers

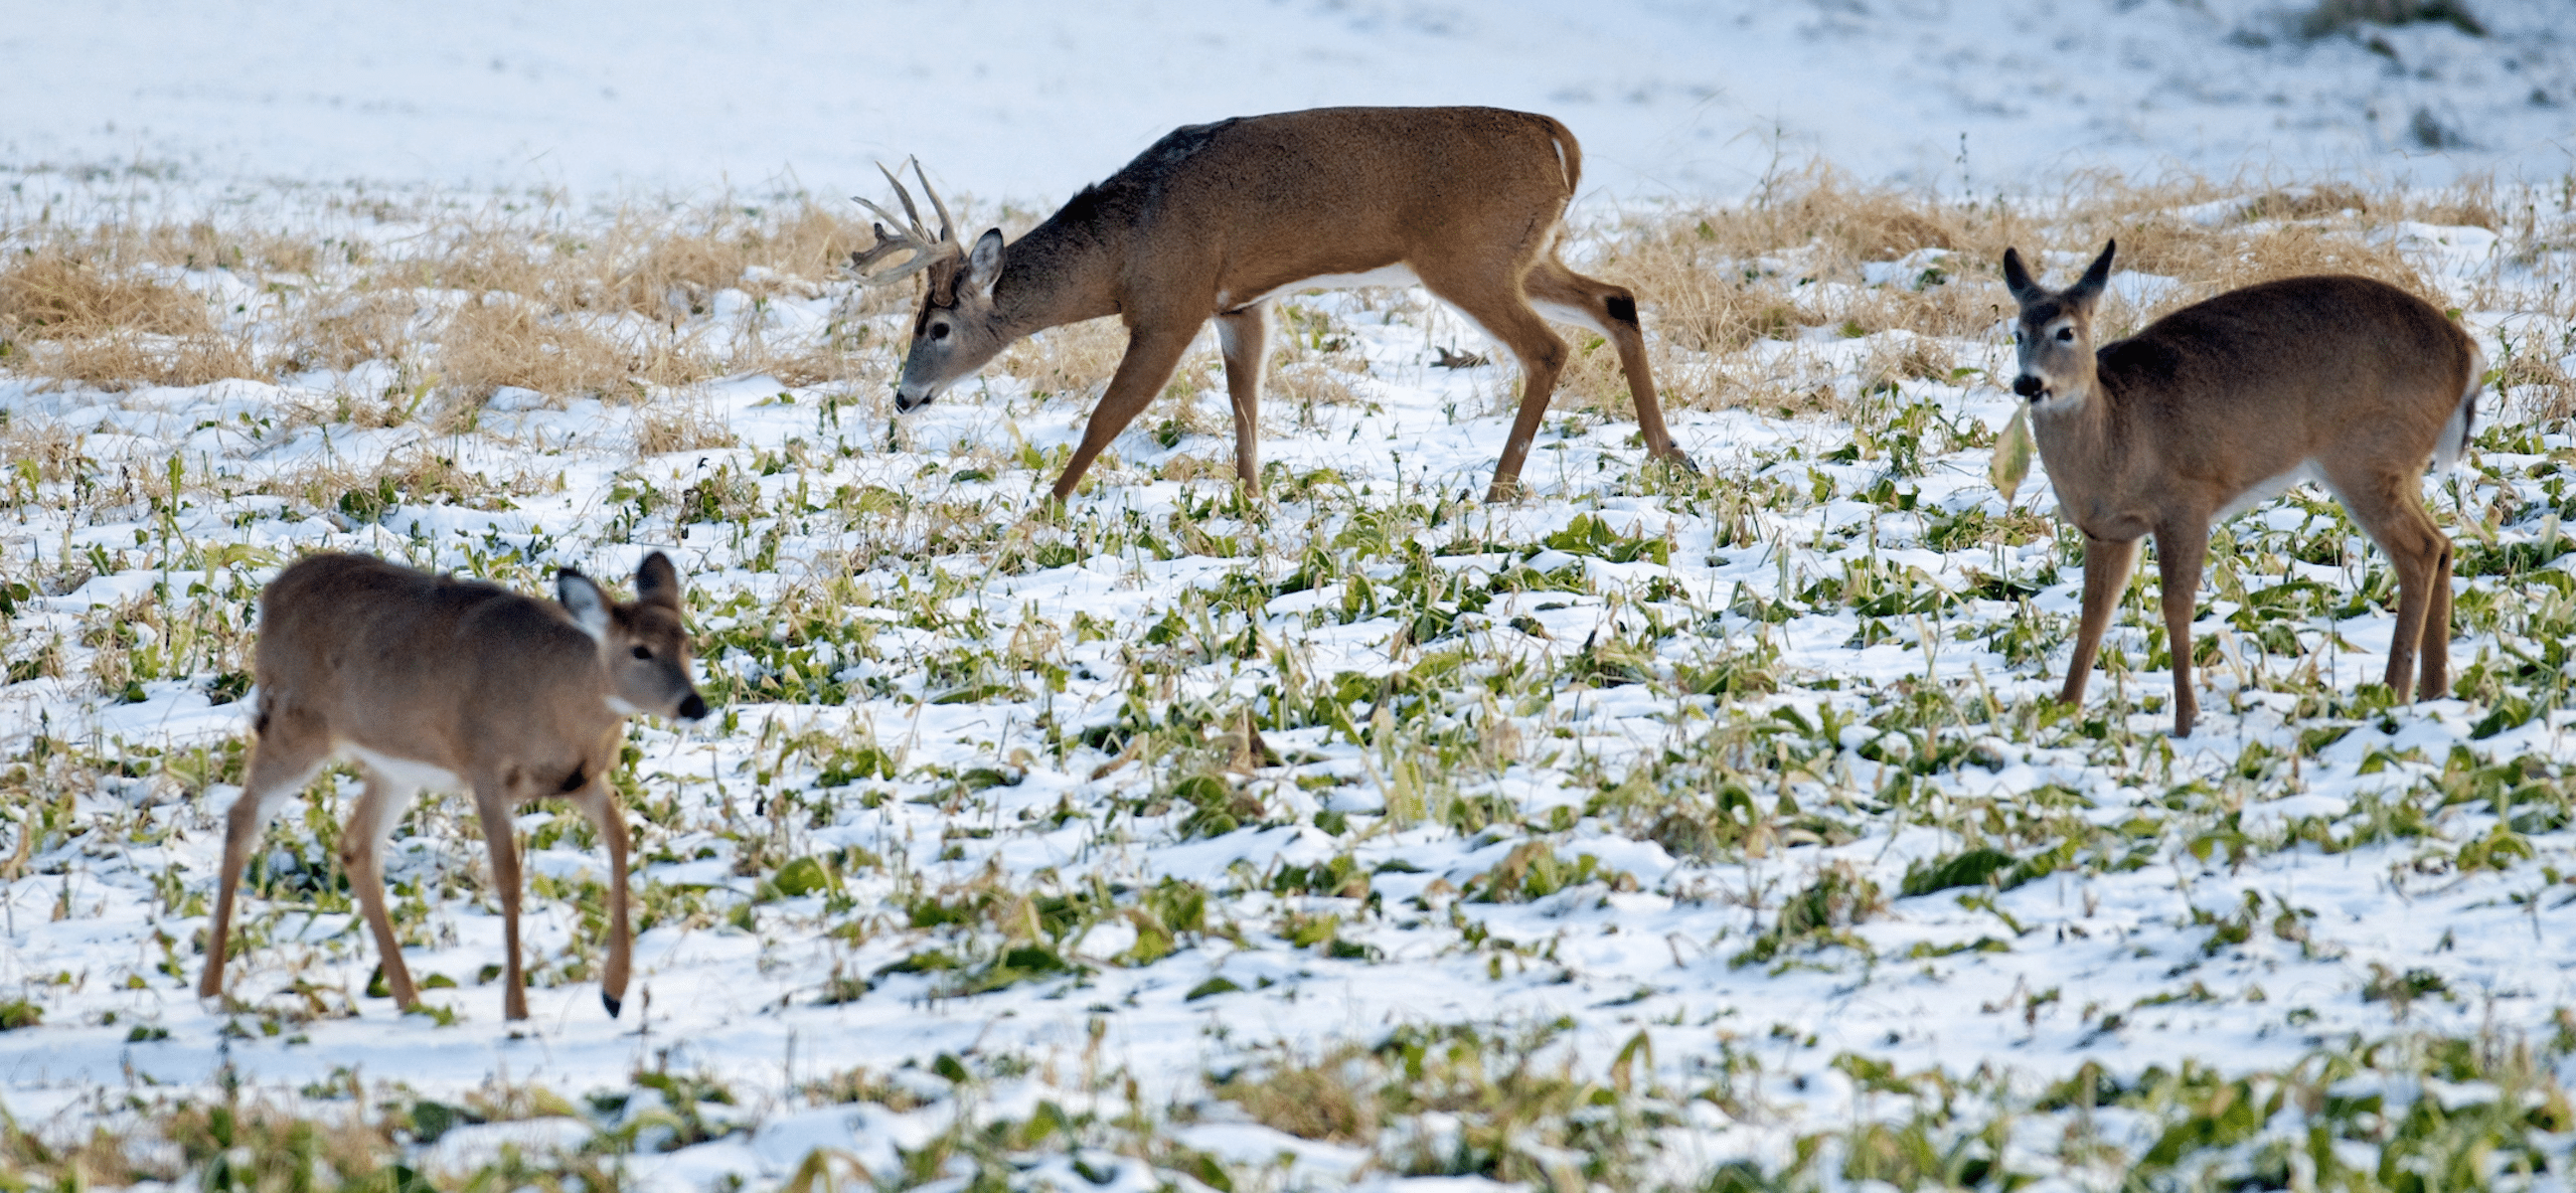
Growing a little bit of forage on your small property can improve your hunting potential.
Step 7: Growing Something Good
My final suggestion is getting to know your neighbors before deer season, especially if your plot is located within a couple hundred yards of your property boundary. Why? Well, it’s best to have the protocol for following a wounded deer that left your property organized before said event happens. Surrounded by reasonable and understanding landowners? Communication is the best way to stay friends and handle a situation such as this, should it occur.
Don’t have sky-high expectations with small-acreage properties since your land’s deer-hunting potential is only as good as the properties surrounding it. Since your land probably won’t hold deer 24/7, you’ll be sharing deer with the neighbors. If they let young bucks go, you’ll likely have a chance to hunt mature deer at some point. But, if they shoot anything with antlers, then young bucks and does are about the best you can expect.
Overall, creating a small food plot on your small property with hand tools isn’t as glamorous as hopping on a big green tractor and letting the fancy implements do the dirty work. But, if it’s the only option you have, then it beats dreaming about a huge property and big equipment that you don’t have. Plant a small plot with hand tools instead.