Are you ready to swap out your camo crocs for some Gucci loafers? Want to make endless Grey Poupon jokes in deer camp and have the fancy meats to complete your delivery? This recipe is something that came out of a little curiosity I’ve had for quite some time. I’ve been trying to find the simplest, most hands off way to cure some venison … and I’m thinking this just might be the easiest process ever. Here’s what to know for the gravlax cured venison loin recipe.
CURE TIME: 3-6 DAYS | PREP TIME: 30 MIN. | SERVINGS: 4-6


This gravlax cured venison loin recipe is an excellent option.
INGREDIENTS
- 1 lb. venison backstrap
- .4 oz. or 2 tsp. pink salt
- 8 oz. or 1 cup kosher salt / same raw sugar
- 10-16 juniper berries, crushed
- 3 tsp. pink peppercorns, crushed
- 1 tsp. black pepper
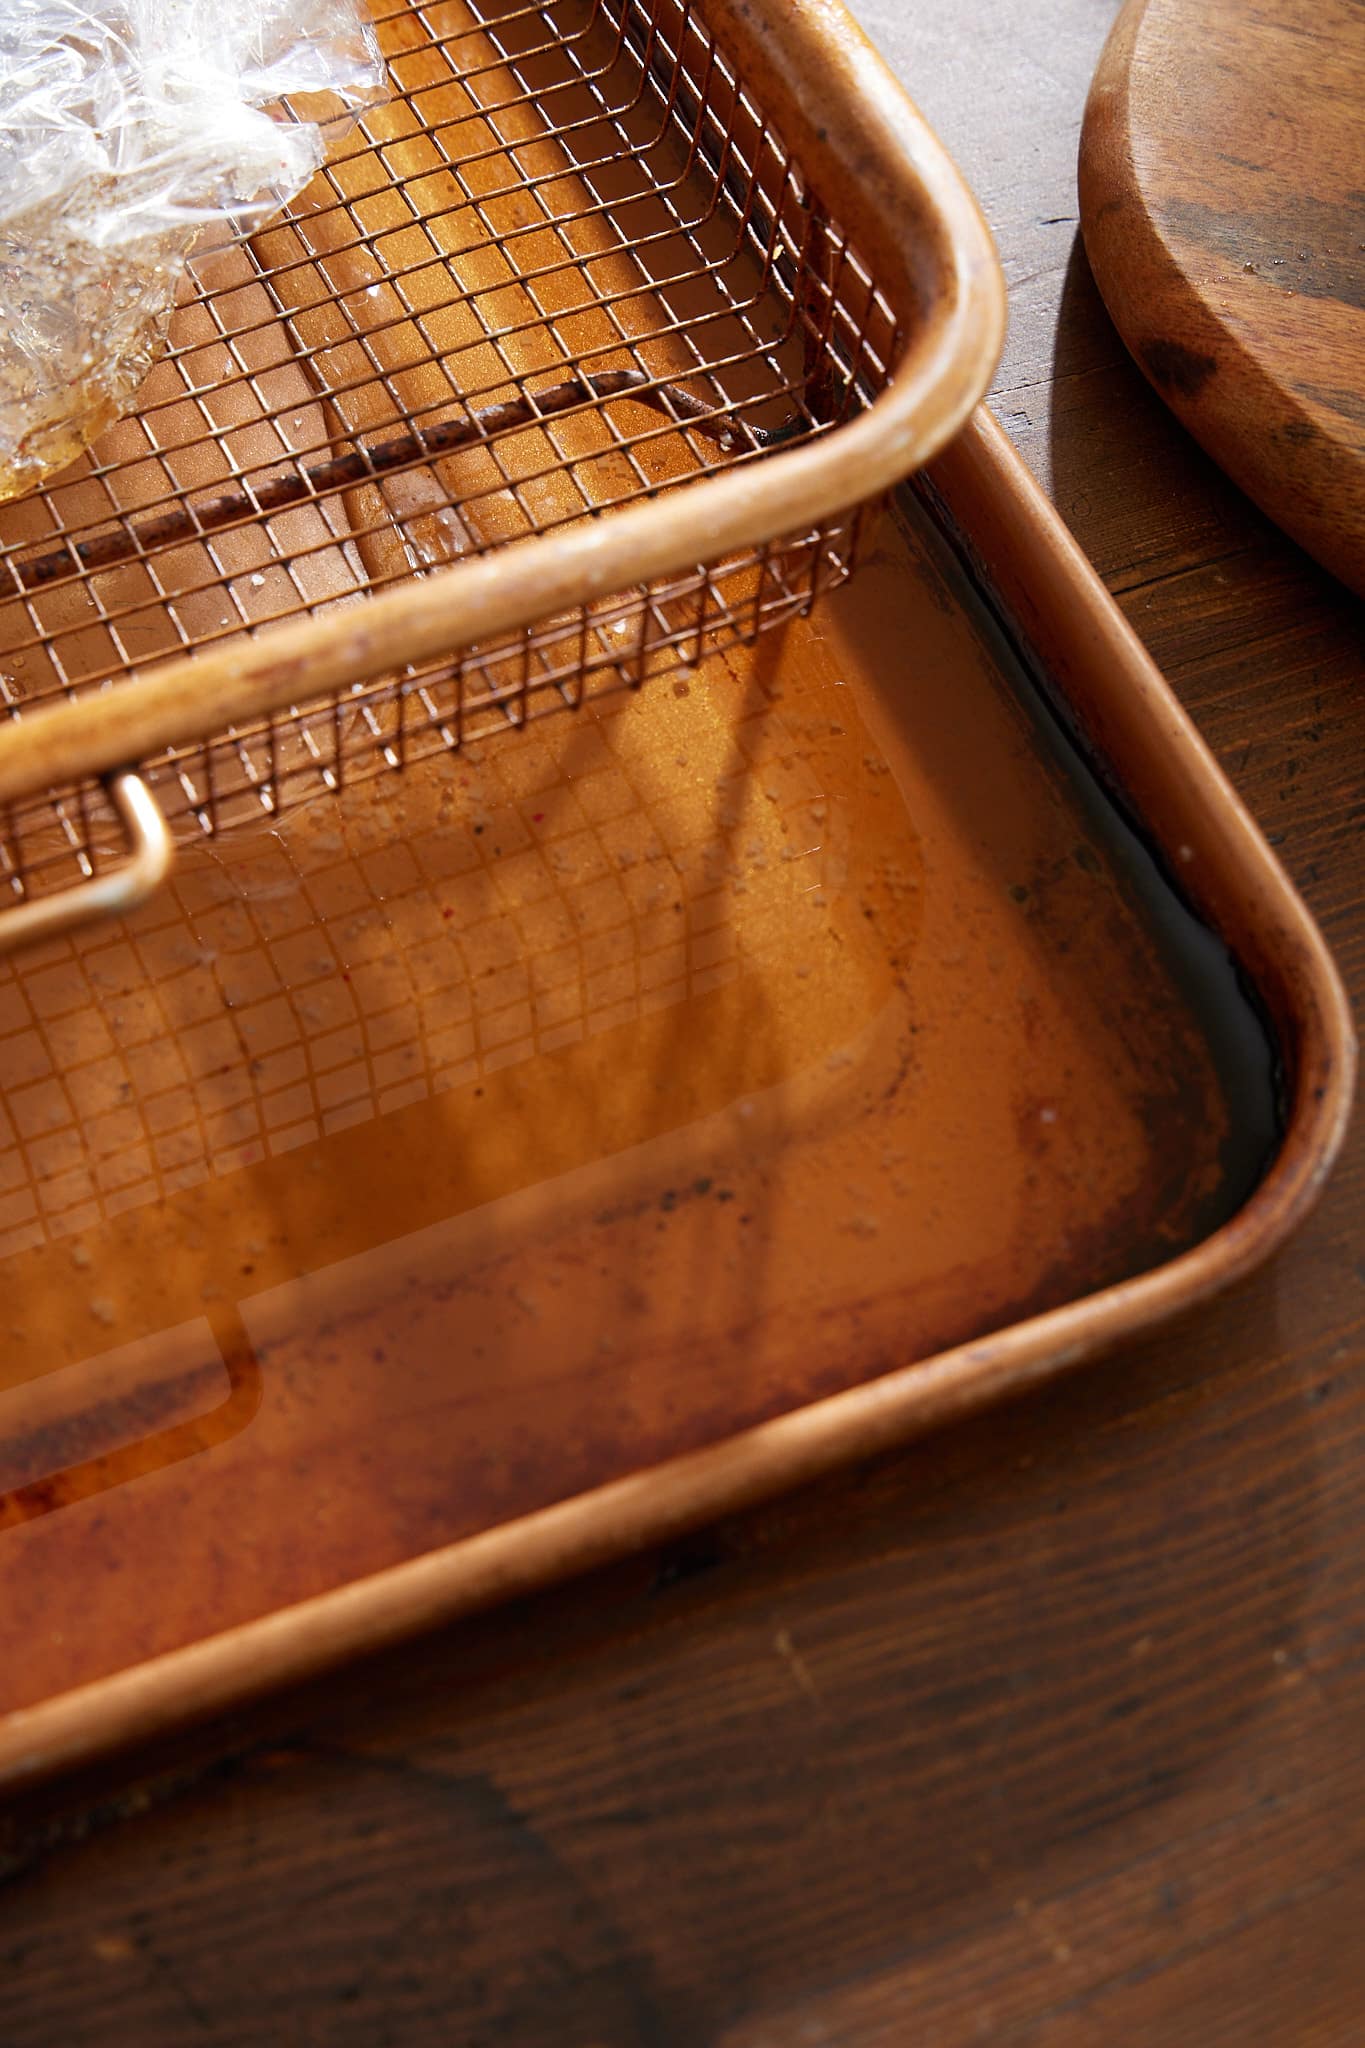
Select a good pan for the liquid to drain into.
EQUIPMENT
- Sharp Cold Steel fillet/boning knife for trimming/slicing
- Plastic wrap
- Cutting board
- Bowl for mixing cure
- 12-inch sheet pan with matching wire rack
- Patience
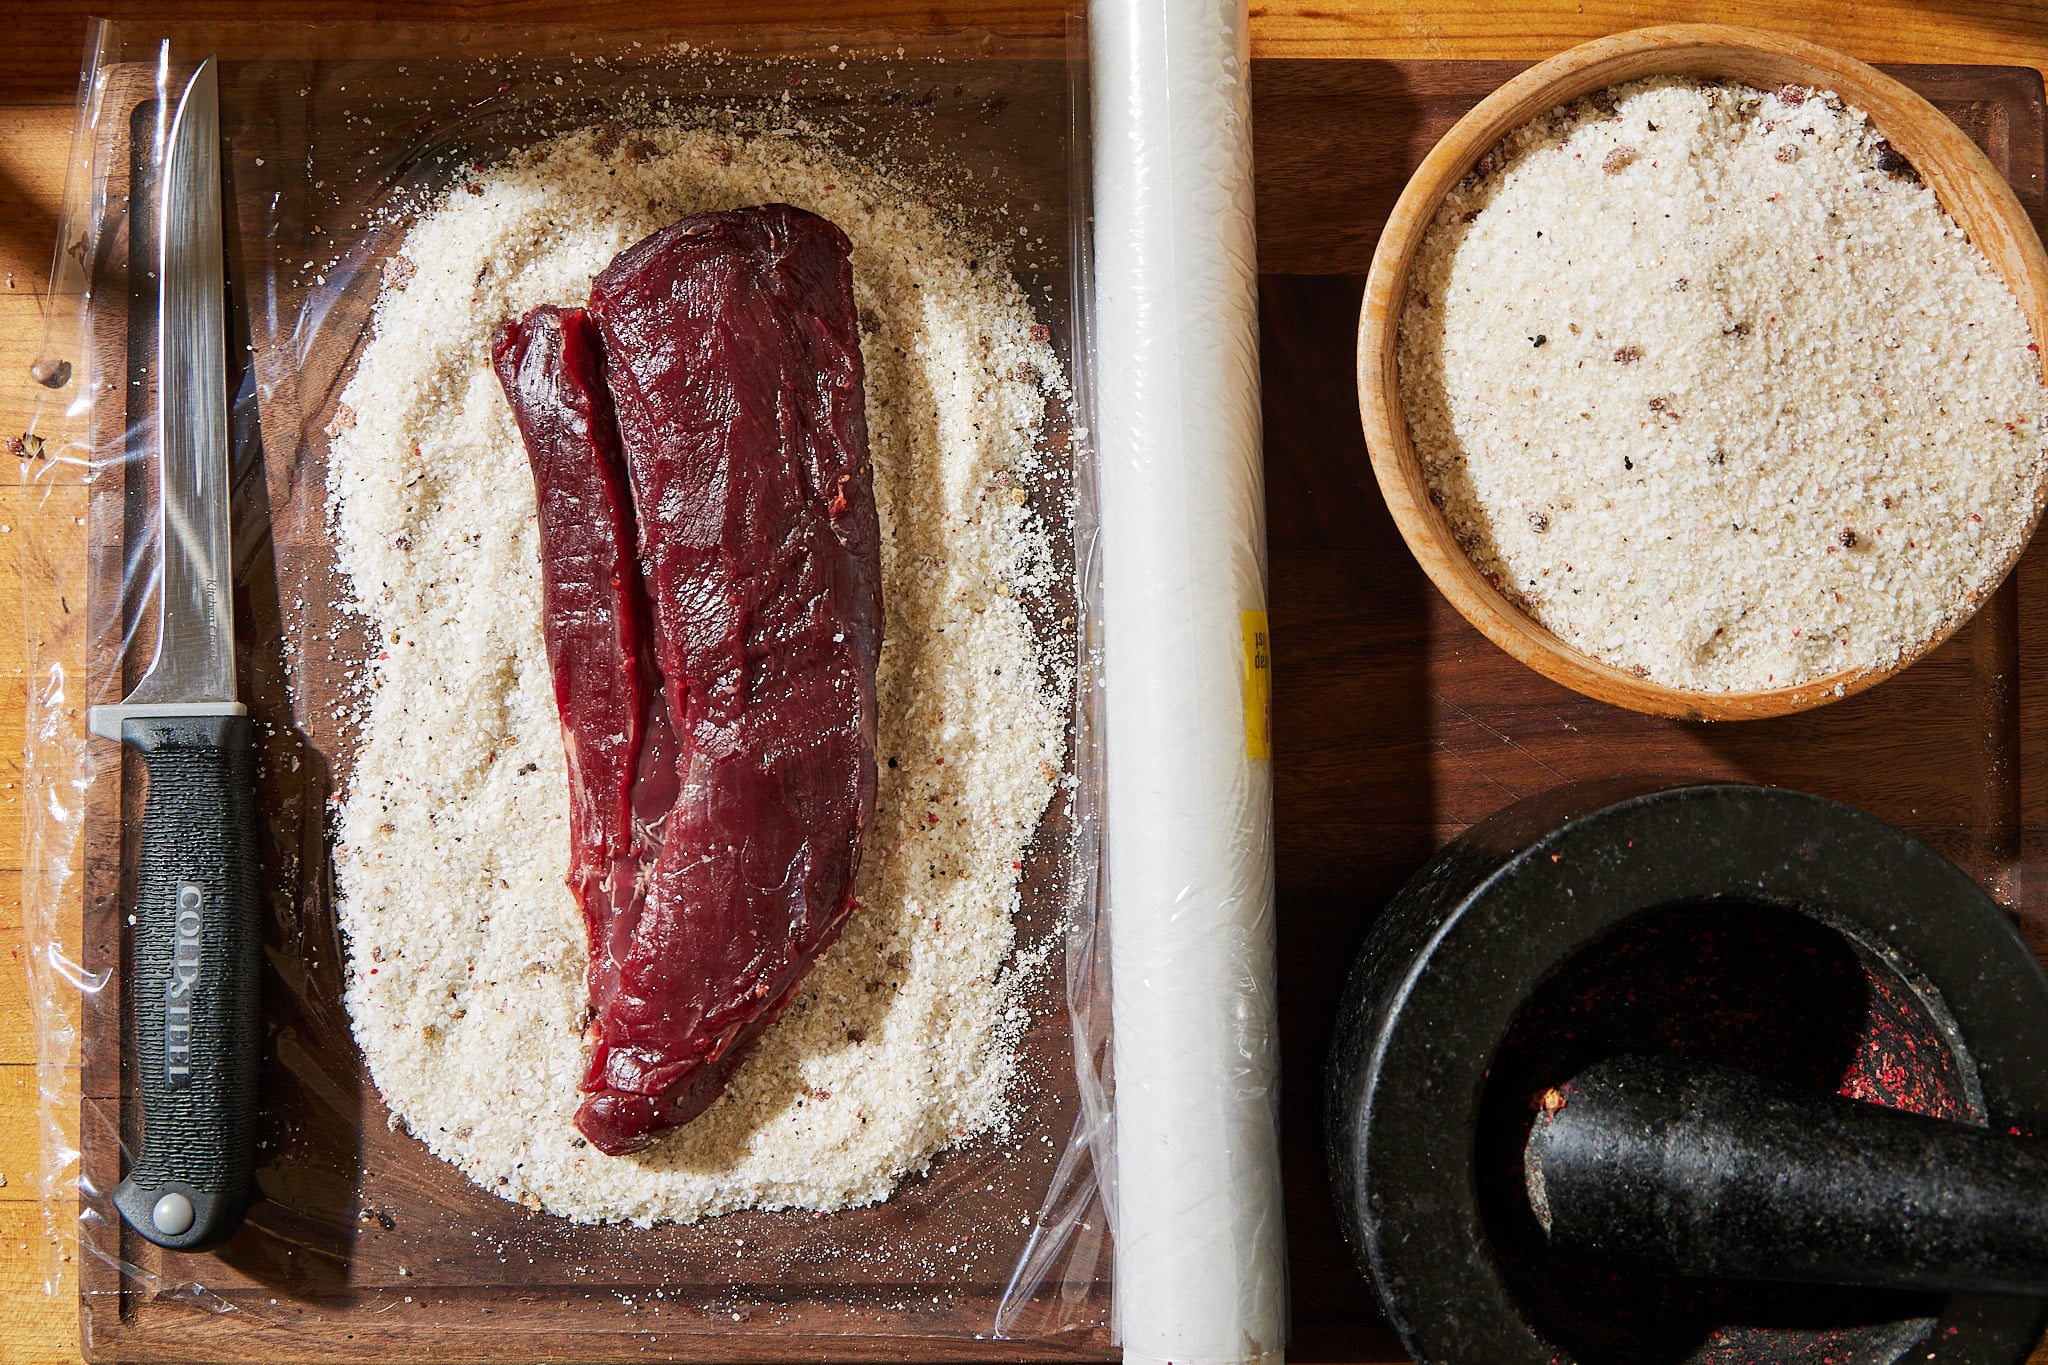
Start with your preferred cut of venison.
INSTRUCTIONS
A decade ago, I started making lox/gravlax (cured salmon) at Christmas for my family. My father would eat about half of the fish himself, some with cream cheese and crackers, some just straight down the pipe. Good both ways.
It’s a simple concept. Mix up a cup of salt, a cup of sugar, and coat a filet of salmon with the skin removed. Then, wrap in plastic. The salt and sugar pull out moisture from the fish, so leave one end of the wrapped filet open for liquid to drip out and onto a tray below.
Knowing how that process worked made me think it could also be applied to something like venison backstraps or tenderloins. I filled two Missouri deer tags, and the moment arrived to test my theory. I’ve talked to a few charcuterie experts about curing and had some Insta Cure No. 1 (quick cure) on hand, which extends the shelf life of this recipe.
Since you’re wrapping the meat in things, inherently they take on some flavors. So, it’s a great time to try anything aromatic you have lying around. Herbs, peppercorns, juniper berries, and smoked salts are all great to add a subtle note to the meat. I had juniper and pink peppercorns that gave a nice floral note.
The resulting cured meat is salty with a touch of sweet, and flavors that feel like where deer comes from—outside. The venison flavor isn’t dulled at all, but rather, is made richer and deeper. This is a great moment to consider where you hunt for foraging. Do you have mountain sage, juniper, or lemony sumac? Think about nabbing some of those ingredients (following a guide for collection and consumption safety) or purchasing some things that fit where that deer came from. Wild meat tastes like where it’s from, and your additions to salt and sugar will also accentuate that overall flavor profile.

A tasty treat for you and your guests.
For prep, unless you love chewing for 5 minutes after each bite, remove any fat or connective tissue on the meat. Mix up the sugar, salts, and spices as your cure. Grab a tray with a metal rack. A 12-inch or quarter sheet pan is the perfect size. Clear room on a refrigerator shelf to accommodate the pan. Cut the 1-pound meat into two shorter portions to better fit the pan.
Lay out the plastic wrap, enough to roll around the meat three to four times. Put enough of the cure as a base below the meat to have a 1/8-inch barrier between it and the plastic. Lay down your trimmed meat on top and cover the top similarly to the bottom. Don’t worry about cure falling down the sides, it’ll get pushed in when you roll up the plastic. I like to fold down a top end like an envelope, and then roll the meat up like a burrito with one end open. Set it on the wire rack with one end lifted to assist in getting the liquid to drip out of the packets into the tray below. I have a fridge magnet under one corner that holds it in place.
After a day or two, you’ll notice a sticky liquid in the bottom tray. It’s not some sci-fi creature growing in your fridge ready to annihilate humanity. This process is completely normal. It’s water from the meat combined with salt and sugar. If it gets too high, drain some off. If you’re at day four and want to go to day six to eight, use more cure in new plastic. In my experience, with smaller backstraps, four days will leave a bit of a raw feel to the inside (in a good way). Six days will get closer to jerky. If you’re trying this with elk, I recommend using tenderloin over the huge backstraps.
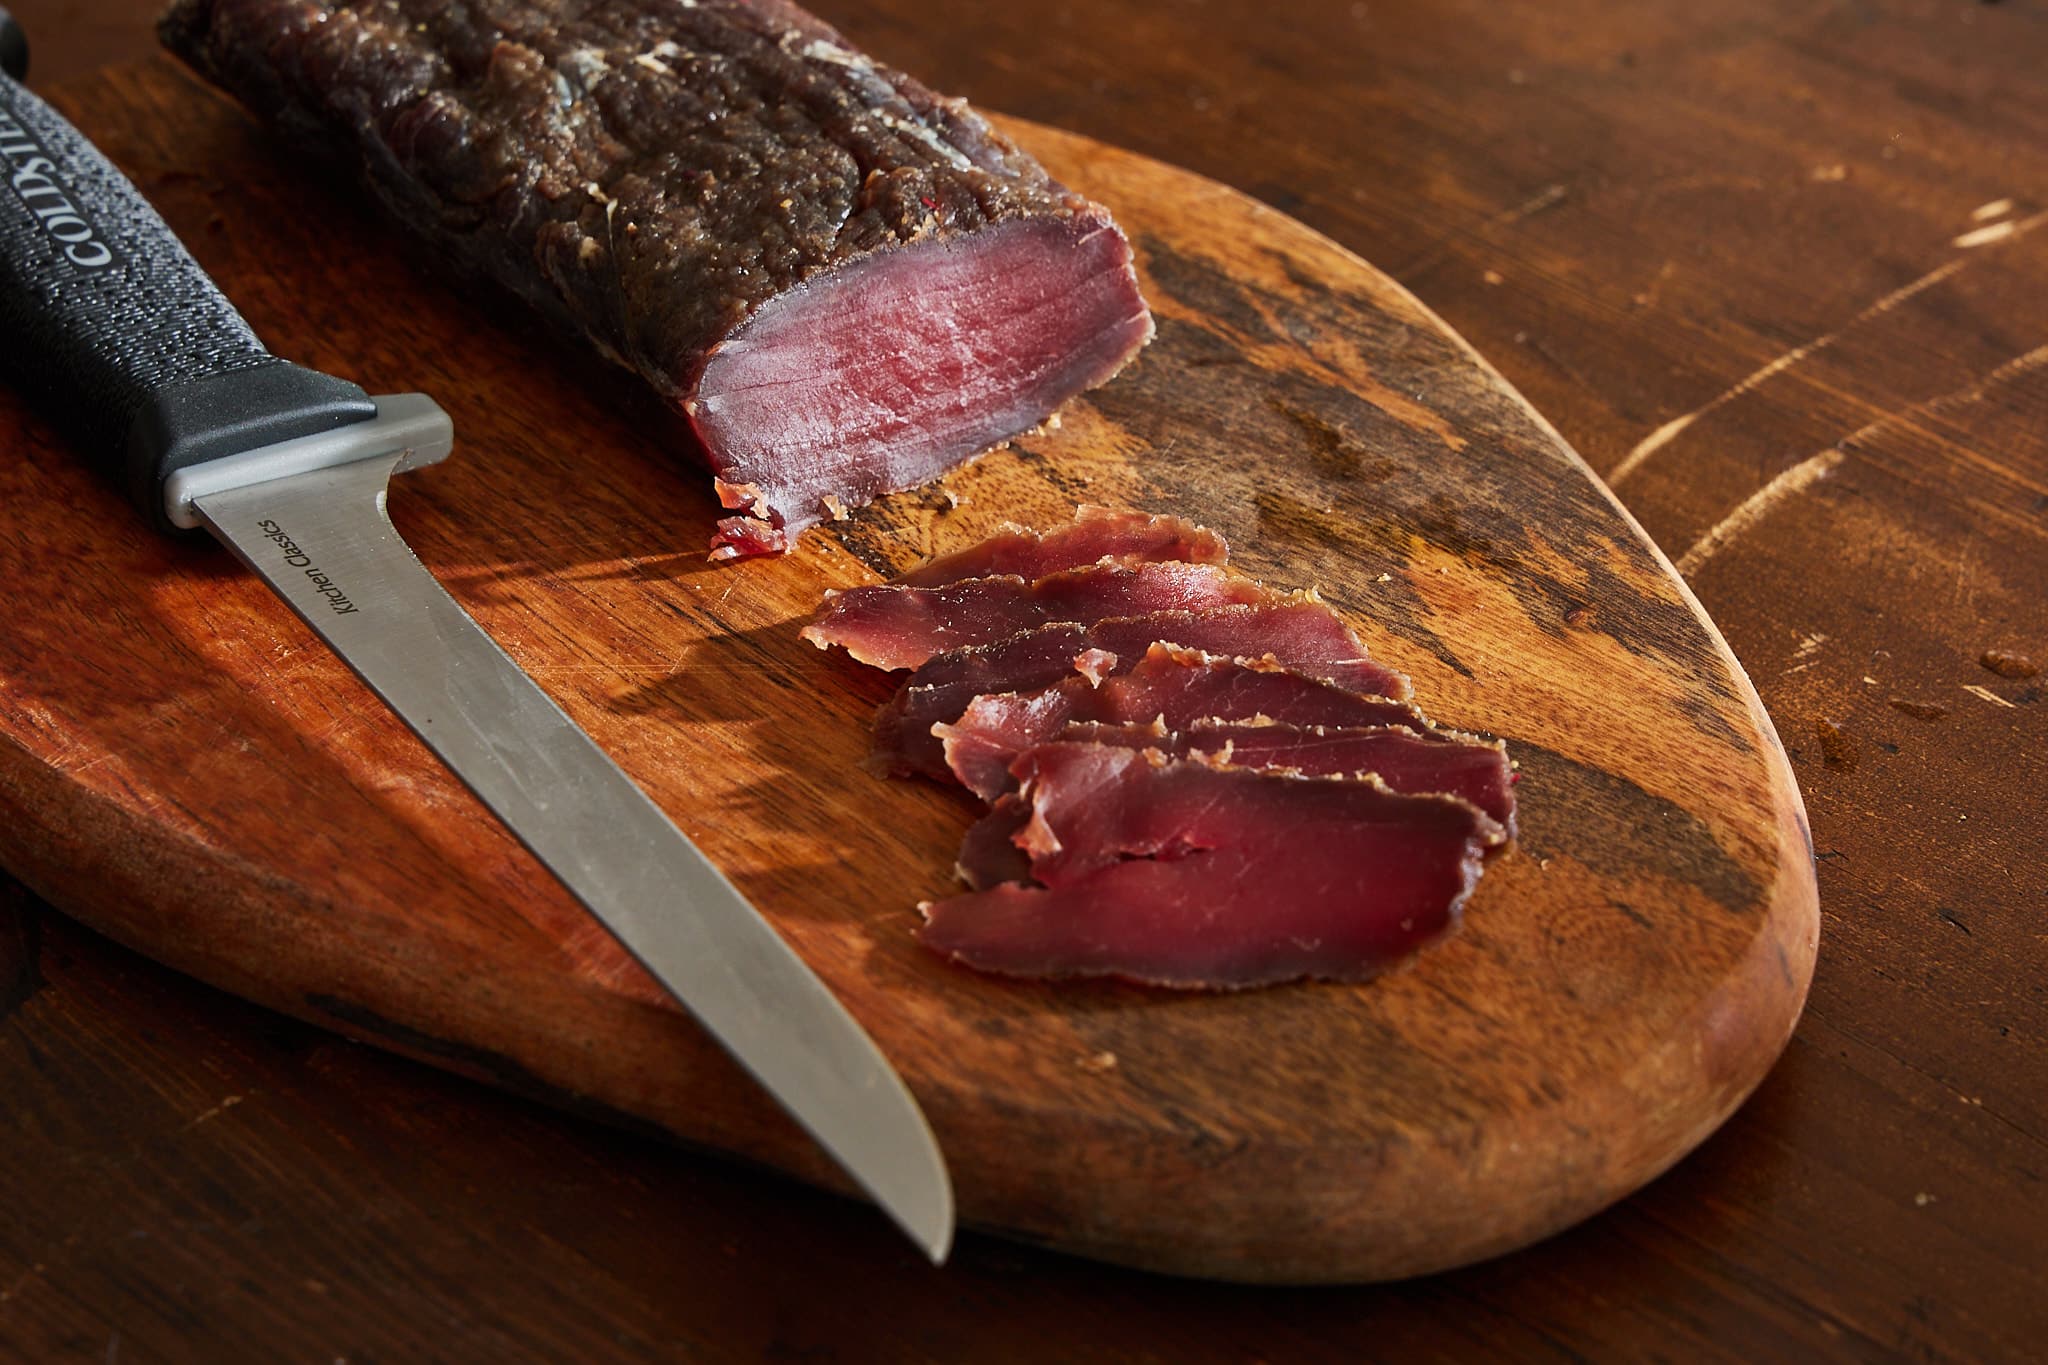
This last step might sound insane, unless you’re from the South and are used to spraying deer off with a hose. That said, rinse off the outside of the meat. Get the water nice and cool and rinse the cure off well for 3-4 minutes. (Don’t worry, that flavor isn’t going anywhere.) Skip this step and you’ll end up with a salty product.
Afterward, pat dry and slice off some pieces to taste. The end bits are always slightly stronger, but as you slice inward, it’ll be more meat and less cure. I like to serve the cured venison with a horseradish mustard, crusty bread, and something pickled or with olives. It’s a killer fancy treat, or maybe the best way to take some venison out into the field as a snack instead of jerky. If you plan on taking it out of a refrigerated environment, a longer cure time will give a more stable product. Honestly, you could slice it up and dehydrate like jerky, or run the whole loin chunks on a cold smoker. Feel free to play around and see what you like.
The gravlax cured venison loin recipe is one that's sure to impress.