
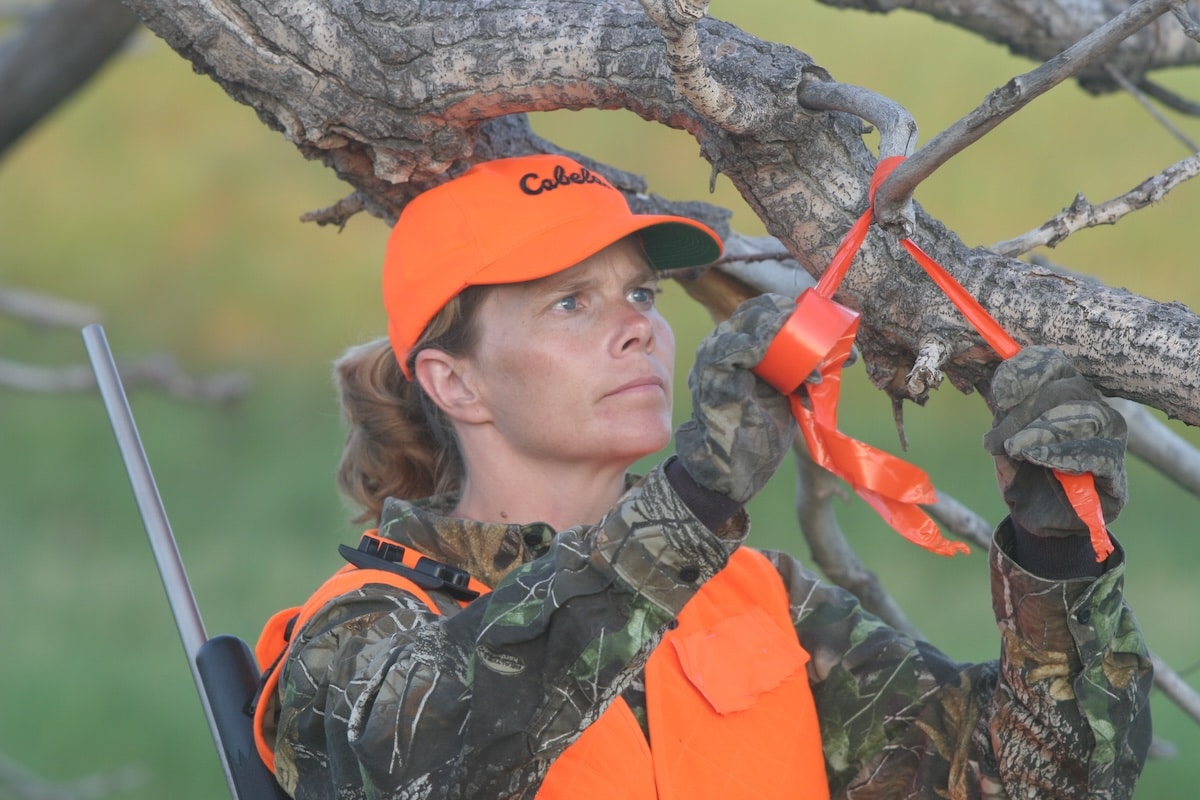

In addition to marking all blood on your HuntStand Pro Whitetail Hunt Area map, bring along a roll of surveyor’s tape to visually mark sign for quick, over-the-shoulder references.
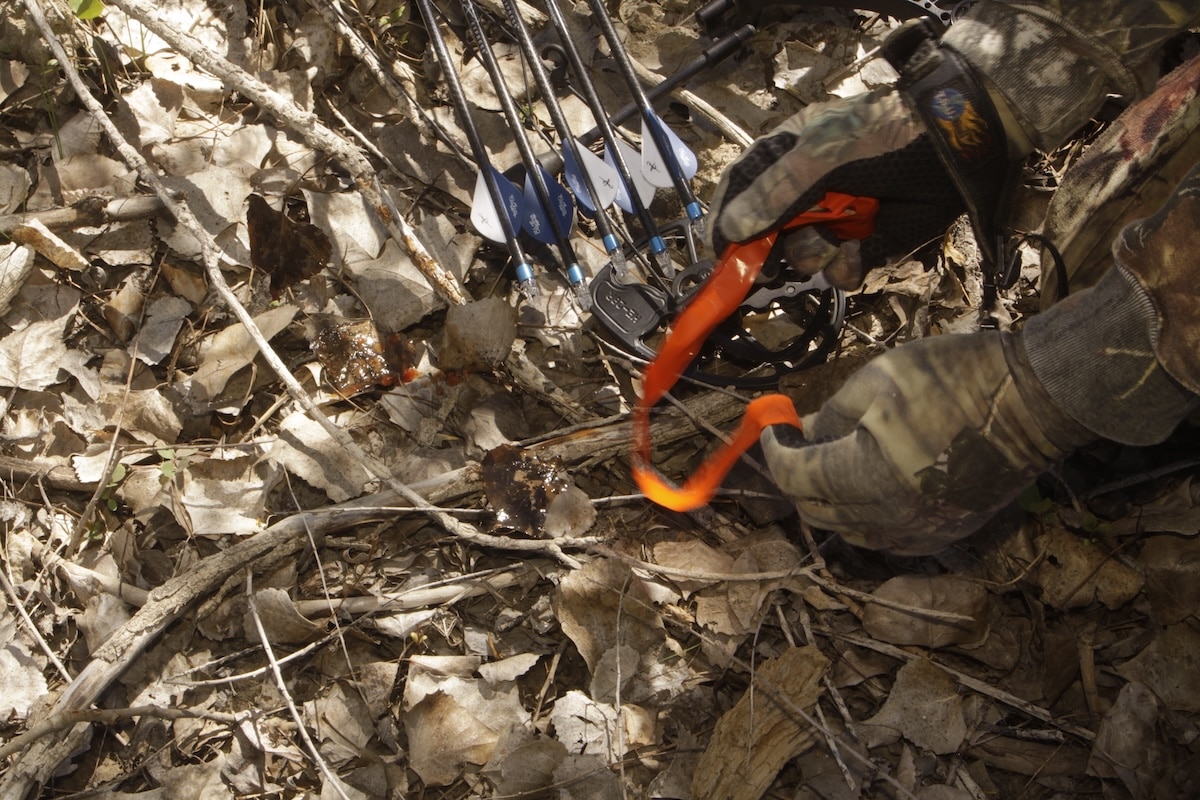
Examine all blood and note its color to help, along with other clues, determine your hit.
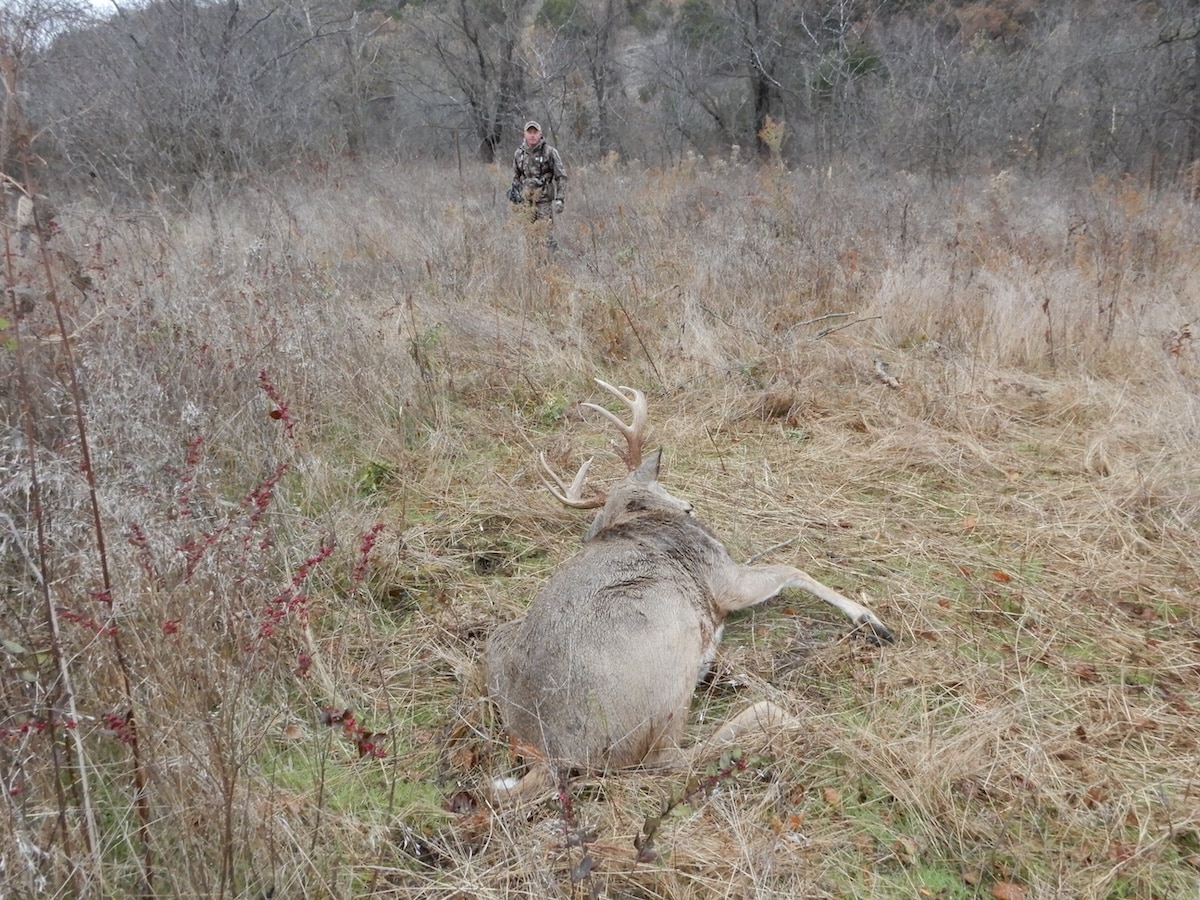
Nobody wants it to happen. Even dedicated hunters occasionally must deal with it. The “it” in question is a wounded deer. Sometimes the unforeseen causes your shot to go astray — and when it does, you best be ready to recover a wounded deer.
Your deer recovery plan should be committed to memory. Follow it religiously and don’t cut corners. Every step, every drop of blood can mean the difference between punching your tag or punching yourself in the gut over a poor recovery.
Here’s how to blood trail and recover wounded deer.
Wounded deer happen to most hunters at some point during their hunting career. How you handle and prepare for it often determines your outcome. Examine all blood to look for clues as to where your arrow hit.
Step 1: Sit, Wait, and Mark Shot Locations
If your deer didn’t drop in sight and you believe your shot was off, the first step is easy: Don’t do anything.
Sit still and reflect on what just happened. Try your best to remember the location of the hit and pull up HuntStand Pro Whitetail to confirm your location and the location of the deer at the time of the shot. From your shot location, back that up with a photo of the area where the deer was standing.
Step 2: Consider Post-Shot Reactions
Recall how the deer left and note any odd movement such as hunching its back, tucking its tail, dragging a leg, etc. Type out notes on your smartphone to avoid later confusion.
A hit through the vitals, or too far forward (or back), could cause a deer to drag a leg. Death might or might not result, depending on shot placement. As a deer flees, stumbling or an appearance of incoherency is also a positive sign. Again, waiting longer guarantees a successful recovery, as opposed to rushing in and bumping a dying animal.
Today, many hunters film their adventures. If you have a video of the hunt, rewind and watch it. Then watch it again and again, even enlarging the image, and watching in slow motion (frame by frame) if your recording device allows.
Now, based on video evidence, make additional notes on the animal’s location and behavior after the shot. Regardless of your perception of the shot, continue to wait.
Finding Big Public-Land Bucks Where No One Else Hunts
While trailing a deer with a partner, have one stay on the blood trail and the second person glassing ahead for signs of the deer.
Step 3: Relative to Shot Placement, Wait the Proper Amount of Time
I can’t stress the waiting enough. Why? Deer die from double-lung and heart shots almost immediately, but it’s not uncommon to misjudge shot placement in the fog of buck fever. If f the deer is dead, it’s not going anywhere, and if it’s still alive you risk bumping it out of your life by pressing in too fast.
A good rule to follow is to wait a minimum of 30 minutes, especially if the deer dashed out of sight, even if you believe the shot was solid. Waiting an hour (or longer) is even better, which gives the deer more time to bleed out.
One-lung shot placements, or liver shots, can take three, four, five-plus hours (or even more) for the animal to die. The deer might’ve kicked its back feet out, or hunched up at the shot, indicating a possible paunch hit. (Deer normally hunch their back when hit through the guts.) A shot to the paunch (gut shot) requires a minimum of eight hours for it to expire.
Another reason to avoid rushing the track job centers on adrenaline. If a deer has enough energy to leap from its bed and escape, it surges even more adrenaline into its system. This fuels a farther escape than if you let it die in a situation where it feels it found a refuge to hide. That adrenaline burst also leads to a lactic acid buildup that taints the taste of deer. Can you say “gamey?”
Shane Simpson, professional houndsman and deer tracker, refers to wounded rutting bucks as “zombie deer.” He has seen countless instances of these testosterone-infused bucks staying alive much longer than you’d ever imagine.
Step 4: Phone a Level-Headed Friend
With HuntStand notes made and the review of any digital evidence, it’s time to phone a friend. Two brains are better than one, and a non-adrenalized perspective helps with logical decisions. Additionally, sharing fine details about the shot with a buddy can be helpful for you to determine if your post-shot recall stays consistent as your buck fever wears off. Without question, leave any anxiety-ridden friends out of the equation. Your buck fever and any added anxiety clouds judgement. That combination could result in a rush to find answers.
A second set of eyes can also aid in spotting blood. Approximately one in 10 males are colorblind, with females afflicted at a much lower range. Anytime I must track a deer, I always reach out to friends with common sense, and who are not colorblind (like myself).
Finding the Best Rut Hunting Spots with HuntStand Pro Whitetail
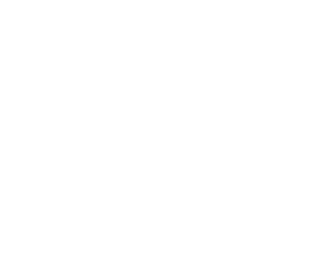
Mark all blood and clues on your HuntStand Pro Whitetail Hunt Area map.
Step 5: Assemble Deer Recovery Gear
Before taking up the blood trail, prepare all your recovery gear from your pack. After marking the shot location and impact site in HuntStand, begin dissecting the terrain in the direction the deer fled using various map base layers. Search ahead for water, benches, thick cover, and be aware of any boundaries the deer might cross where you must acquire permission before entering. The Property Info map layer can make it much easier to find a neighboring landowner, especially if their residence is separate from their land.
In addition, have a roll of biodegradable blaze orange surveyor’s tape available. These visual aids, in addition to the blood markers you drop in HuntStand, offer a quick, visual review of the deer’s path.
A flashlight helps in dusky or dark conditions. You might even wish to pre-purchase a light aid specifically designed with LEDs to highlight blood. Be sure to pack along extra batteries.
Another inexpensive way to confirm blood is to pack a small spray bottle filled with hydrogen peroxide. Hydrogen peroxide foams when sprayed on blood for quick confirmation.
Finally, take your binocular along for tracking. Use it to scan ahead to spot any signs of your deer, bedded or standing. Spotting a deer before spooking it could be the difference between a happy ending or seeing that deer for the last time as it flees.
Step 6: Read the Blood Trail
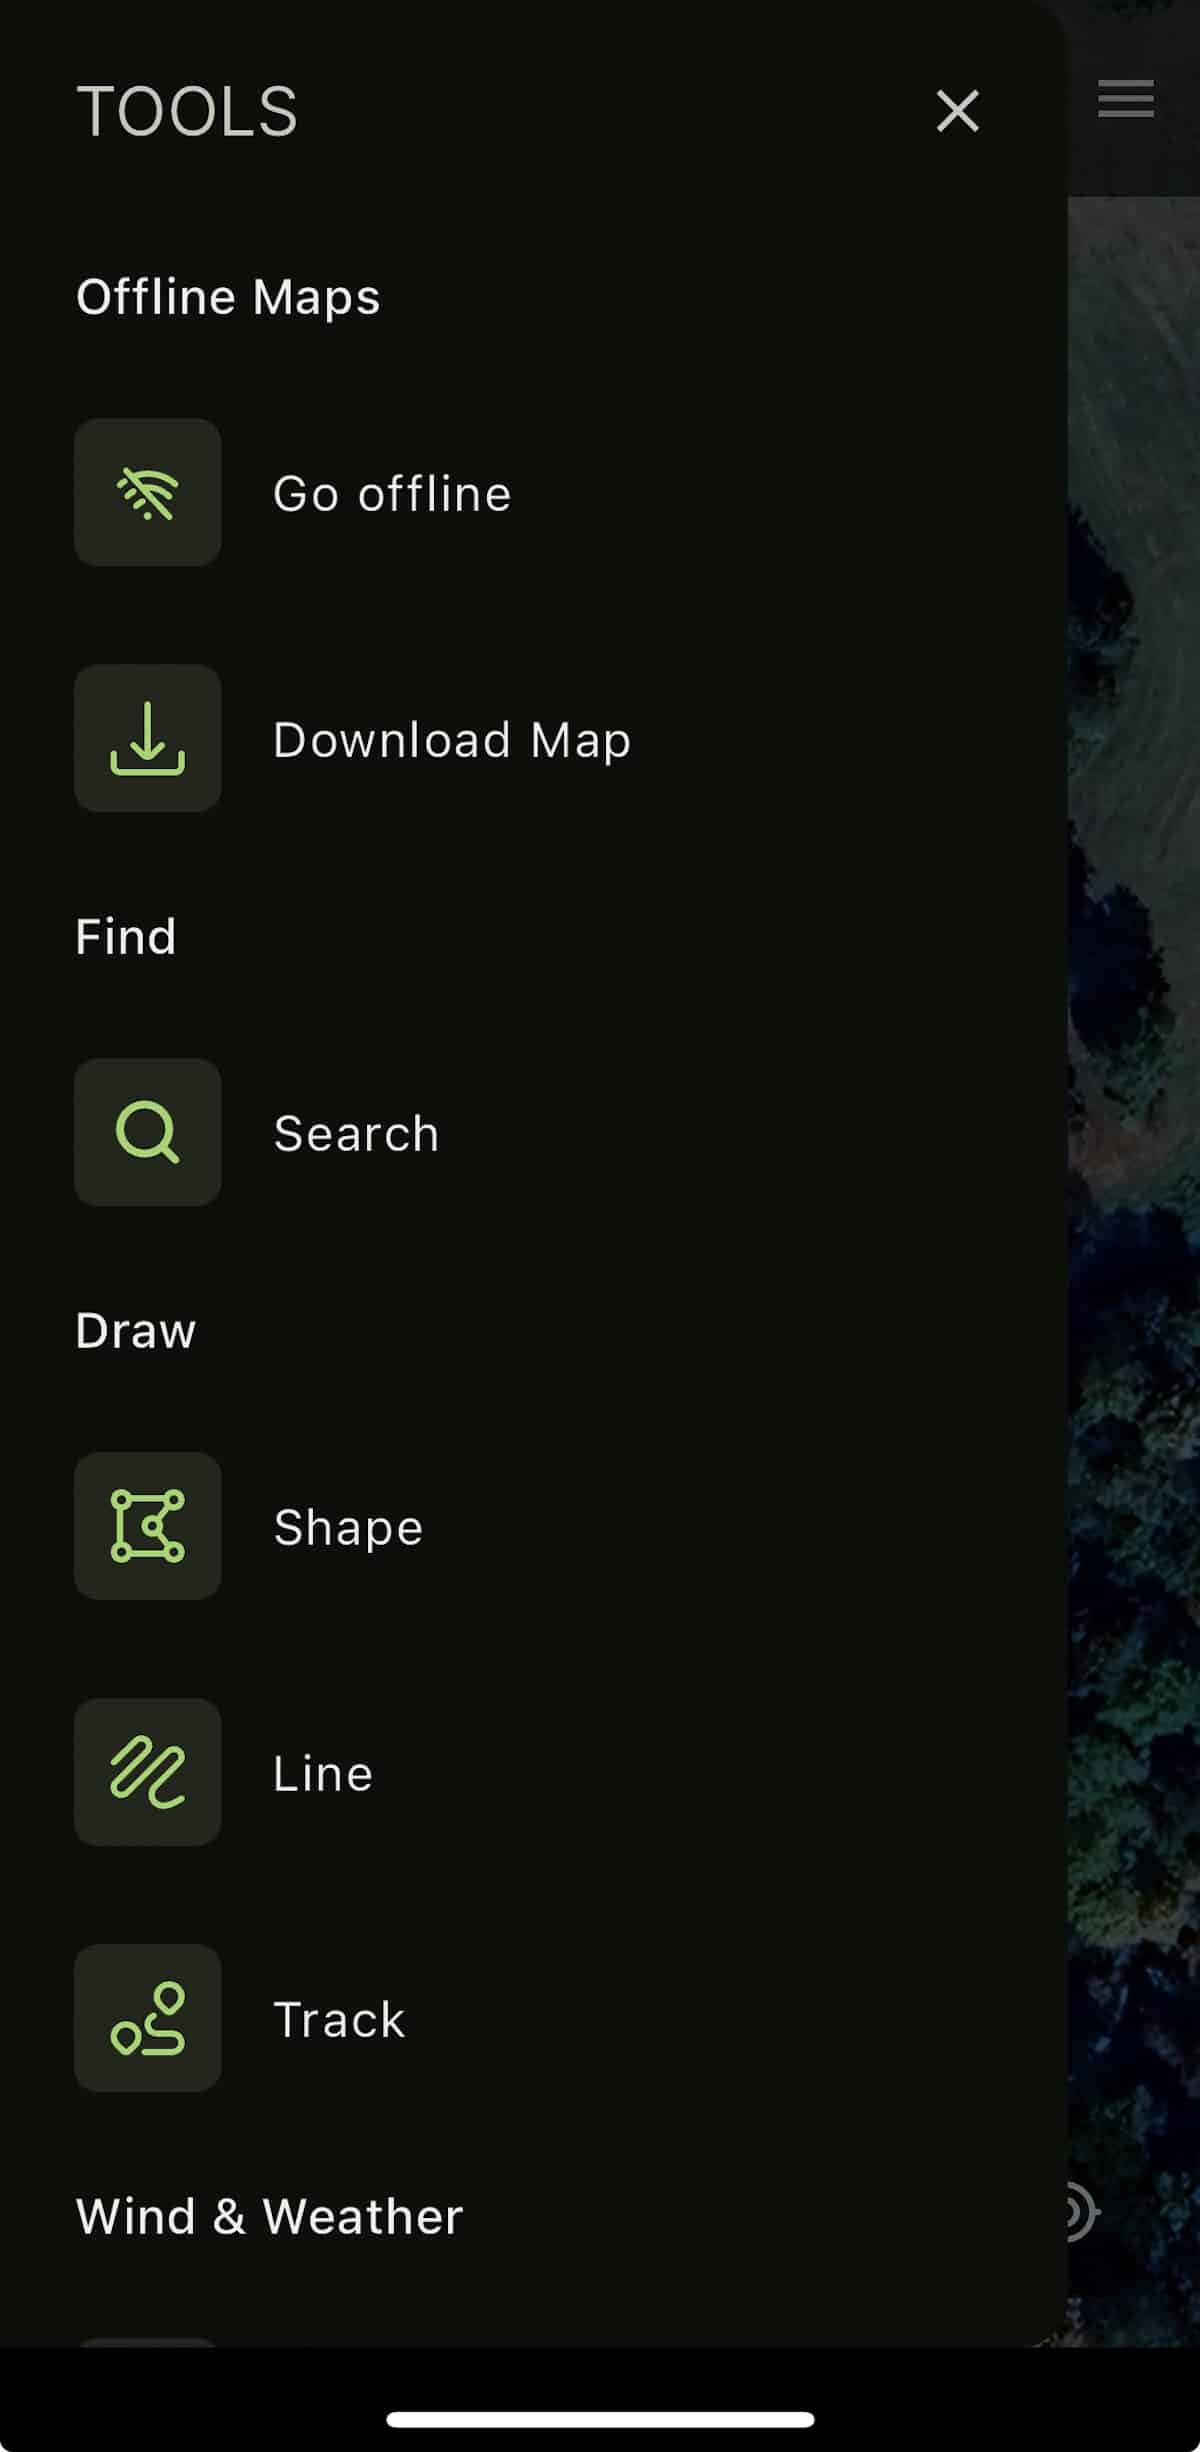
Once your re-enforcements arrive and you’ve waited an appropriate amount of time based on perceived shot placement, begin tracking. Turn on the Track tool in HuntStand to trace all your steps on the blood trail in real time and save the track in case you need to reference it later. Use HuntStand at every turn of the trail to peer ahead and understand the terrain you’re about to tackle. The 3D Map feature offers a virtual flyover of what lies ahead, along with clues on where a deer might escape.
Beginning at the location of the hit, look for blood, hair, or other matter. If you’re bowhunting, look for the arrow and, if found, inspect it thoroughly. Is the arrow fully covered in blood? Does it smell of foul gut matter? Does it only contain hair in the broadhead? Pay attention to the arrow, but also don’t put all your stock in it, as it can be deceiving — especially if it zipped through dirt or leaves and disrupted the shot evidence on the broadhead and shaft.
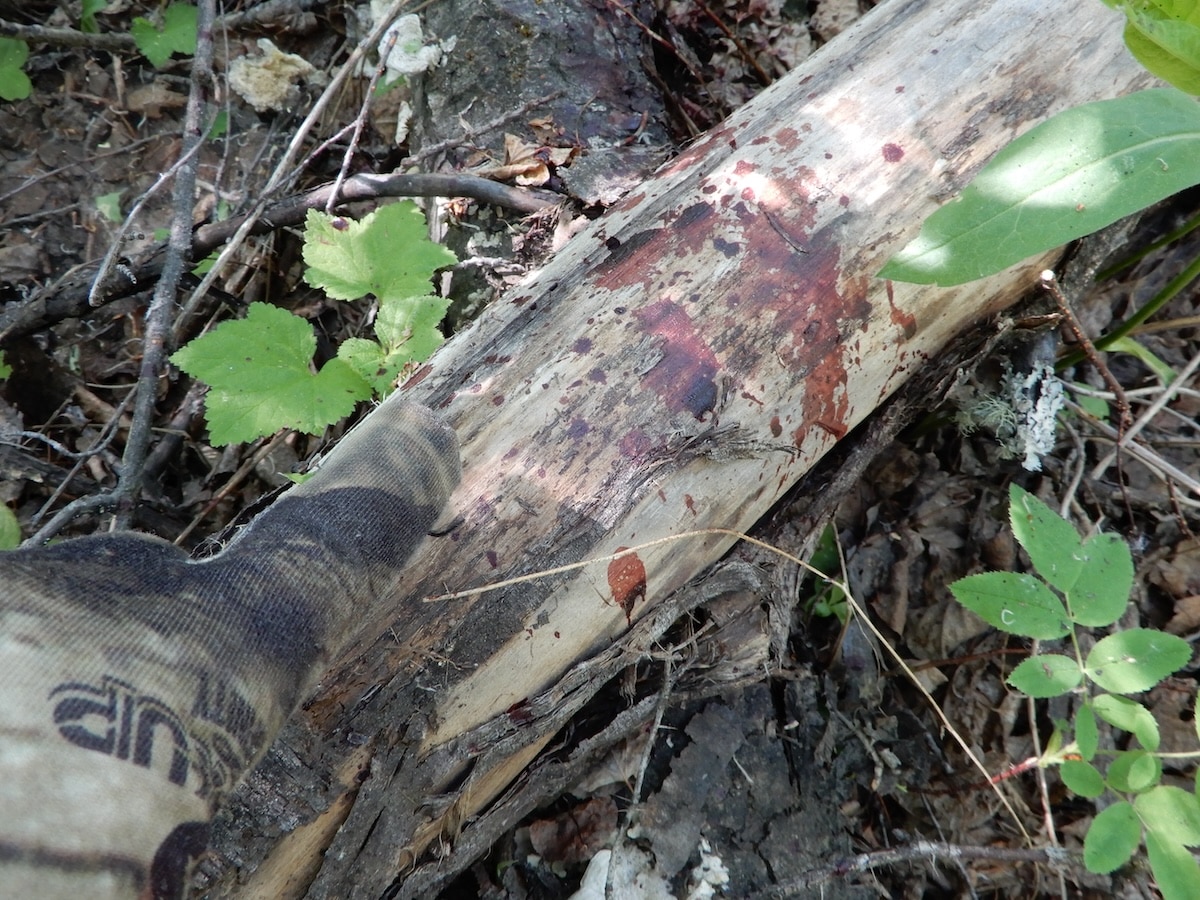
Bright-red blood indicates an artery wound and a high probability of recovering (if you sliced a major vessel). Wait a full hour and then begin trailing.
Bright, frothy blood inspires hope of a lung shot, particularly if it’s sprayed on vegetation lining both sides of the escape trail. You’ve got a green light for recovery. Frothy blood on only one side of the trail requires three hours (or more) of waiting, as you might only have pierced one lung.
Dark red blood generally means a muscle hit with questionable recovery success. It could also indicate a liver hit. If so, death could result within four to five hours, sometimes longer. Wait it out for the best results.
Lastly, brown or green-colored blood means a gut shot. The color comes from gut matter, possibly mixed with blood. Death is almost certain, but remember, it takes a minimum of six to eight hours. So, be patient for the deer to die. Hold off and take up the trail after the long wait.
Using Canoes and Kayaks for Better Public Land Deer Hunting

Bright blood is generally a good sign, but waiting is still recommended.
Step 7: Read Other Sign
Hair also tells a story. White hair at the hit location points to a low hit. Dark hair could also mean a brisket shot, as mature deer oftentimes have a dark strip of hair beginning at the point of their chest and diminishing as it goes back. Brown body hair could indicate a good, marginal or poor shot as it resides almost everywhere else on a deer. Use other clues to help you determine where brown body hair might be from.
When it’s time to take up the trail, move slowly and quietly. Every speck of blood, tissue, and disturbed dirt should be marked on your HuntStand map, and marked again with the surveyors tape.
Follow the blood trail, but stay off to the side to leave the trail and evidence in tact. If you’ve got a buddy supporting the mission, keep them at last blood and continue to hopscotch forward. Your buddy can also be scanning ahead to look for signs of the deer. You might unexpectedly walk up on it, living or dead. Handle your weapon safely, but keep it at the ready if you’re still within legal shooting hours. Some states have specific rules prohibiting carry of a weapon if you’re tracking a deer after legal shooting hours.
Wounded deer don’t always follow textbook rules. Oftentimes they travel downhill for a less strenuous route and head to water to rehydrate from blood loss. Nevertheless, they might go straight uphill and sneak into a desolate valley if they believe they’re being tracked.
Step 8: Keep Searching
What happens if you don’t find your deer on the first attempt? If you still believe the deer is mortally wounded, yet the trail disappears, give it a break.
Deer oftentimes circle back to the area where they were wounded, because it’s their home. Come back later the next day and do another sweep. Look and listen for signs of scavengers — crows, ravens, hawks, eagles, or coyotes — that could be feeding on the carcass. Only you can determine when enough is enough, but at some point you might have to accept the inevitable. You might not find the deer.
Other deer recovery methods (where legal):
- Grid-searching for the carcass (with HuntStand Track turned on)
- Consulting the services of a deer tracking dog (leashed or unleashed as regulated); check out the TRAKR app for a growing nationwide network of deer trackers
- Calling in a drone deer recovery service (if permitted within that state)
Whitetail Rut Deer Hunting Guide with HuntStand Pro Whitetail
Mark all blood and clues on your HuntStand Pro Whitetail Hunt Area map and use HuntZone to maintain a downwind presence, if possible, to avoid alerting a wounded deer with your scent.
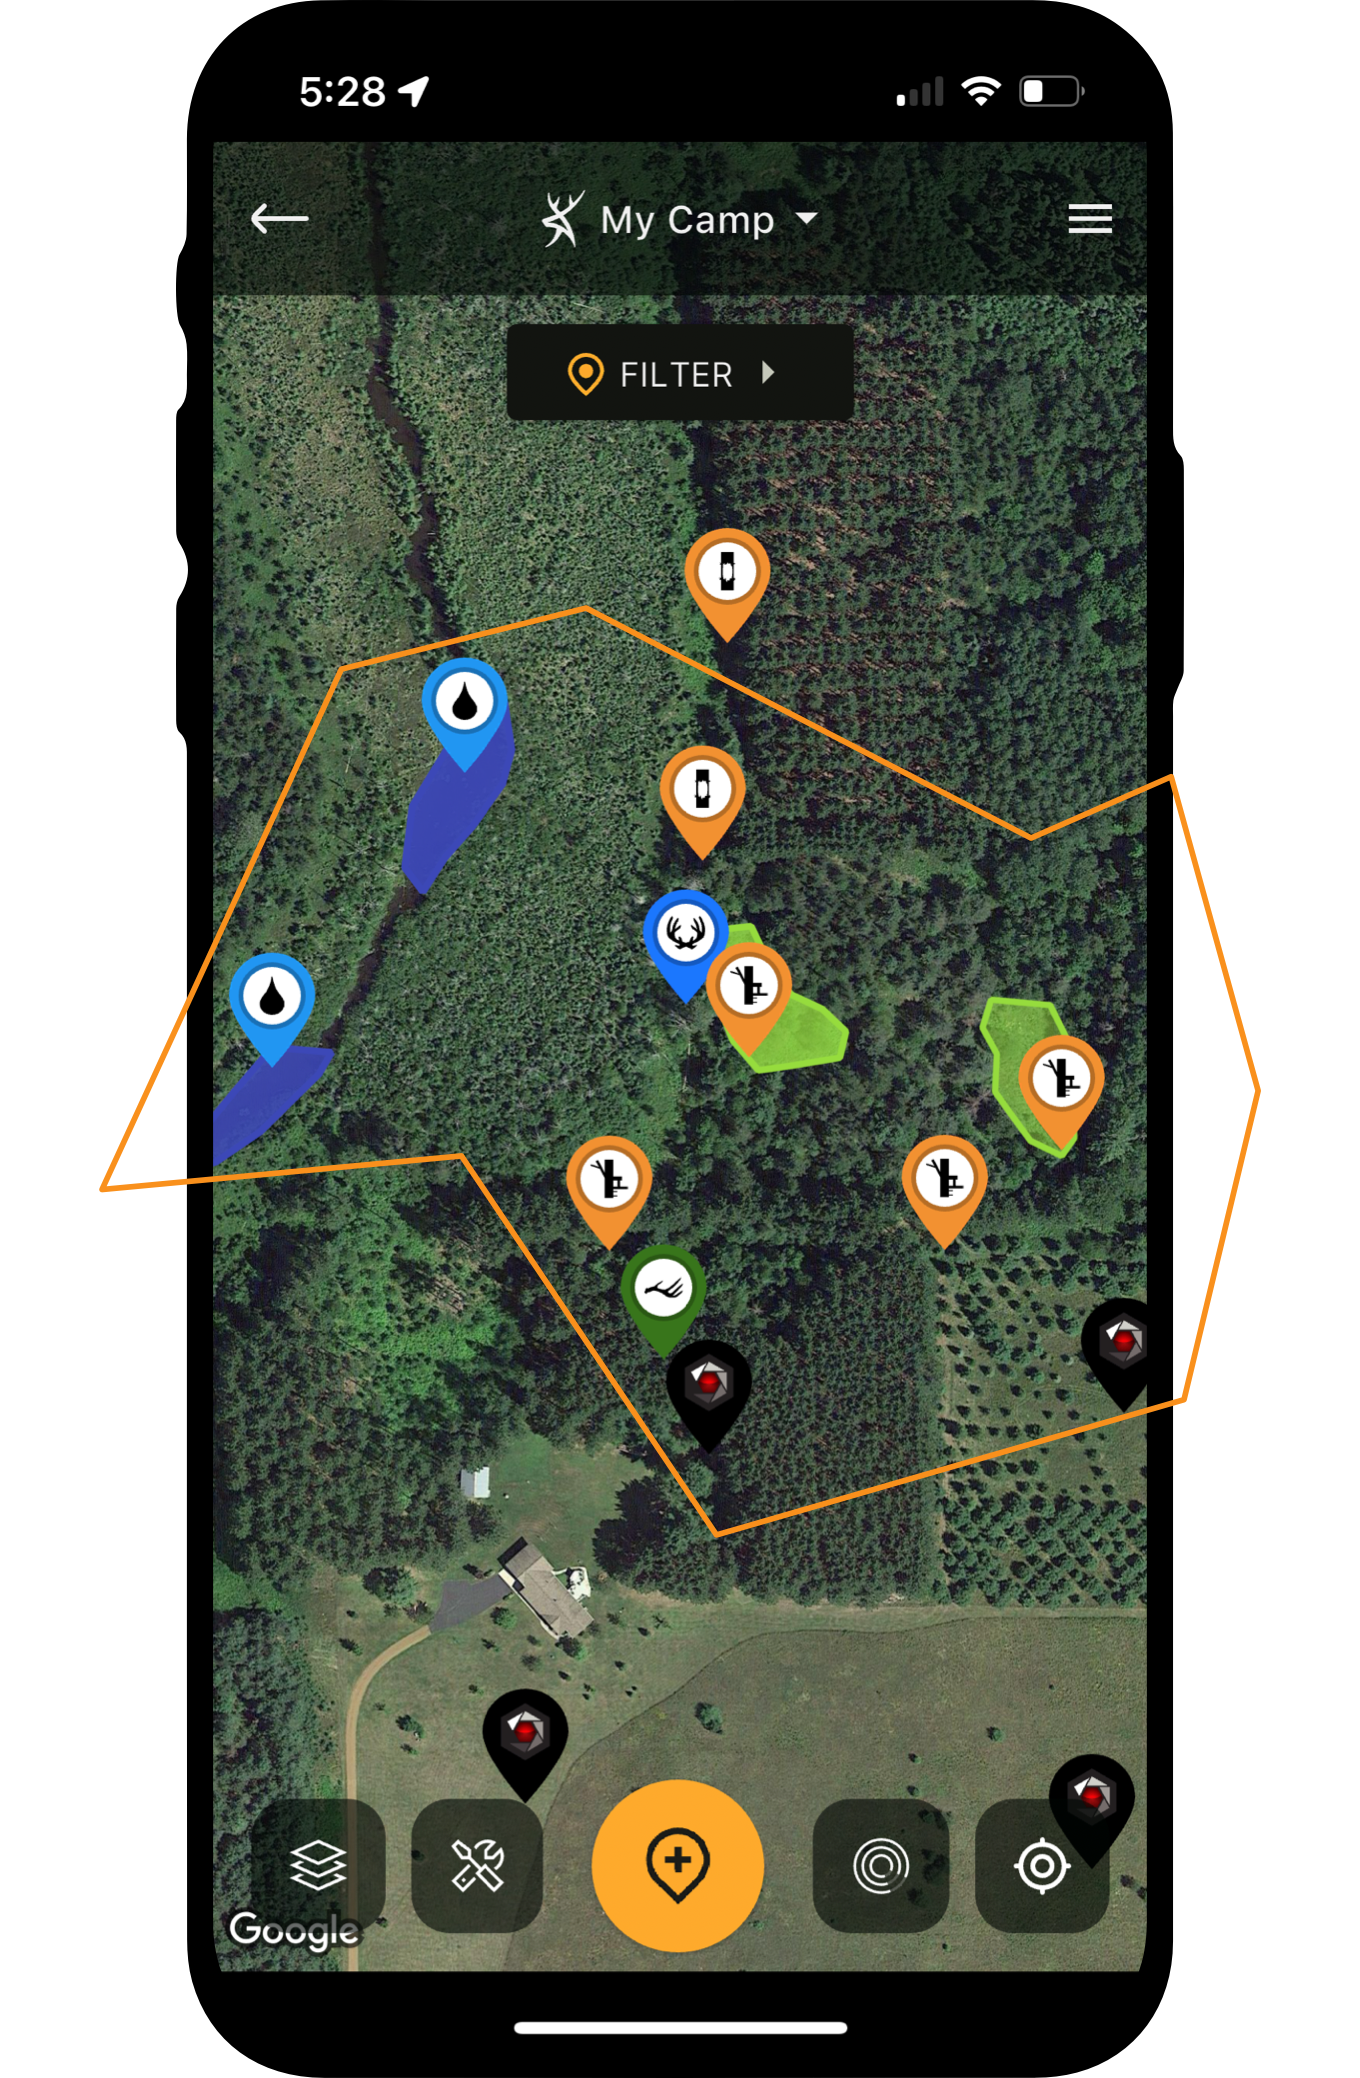
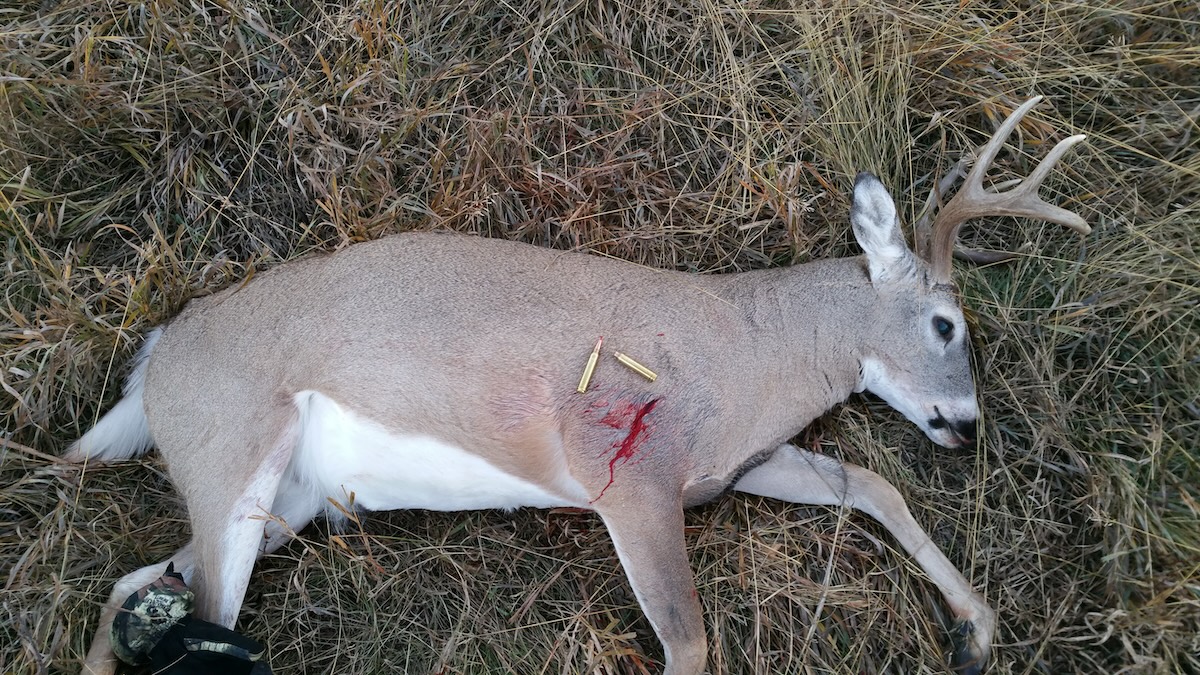
Find the Deer or Accept the Inevitable
It’s a sad prospect, but if you hunt long enough, especially with archery equipment, losing a deer is always a possibility. If the deer density is high in your area, begin hunting again. It takes your mind off of the situation. You can also take solace in two other facts: Oftentimes, an arrow-wounded deer hit outside of the vital zone will survive. Your trail camera might pick up the deer soon after. If you feel the deer was gravely hit, the carcass will feed other wildlife. It’s the circle of life, and your experience will serve to make you a better hunter, and hopefully avoid the situation on a future hunt.
UPGRADE TO HUNTSTAND PRO WHITETAIL